Quick Links:
[Official Rulesheet]
- Game Information
- Layout
- Modes of Play
- Character Selection/Leveling Up
- Skill Shots
- The Campaign Map
- Dungeon Crawls
- Multiballs
- Other Scoring
- Wizard Modes
Game Information & Overview:
- Lead Designer: Brian Eddy
- Code/Rules: Dwight Sullivan, Corey Stup, Elizabeth Gieske, David Sullivan
- Lead Mechanical Engineer: Thomas Malcolm
- Artwork: Vince Proce
- Display and Animations: Paul Chamnankit
- Sound Design: Jerry Thompson
- Release Date: February 2025
- Wiki Rulesheet based on Code Rev: 1.00
- Edit the Code revision, if applicable, when you make changes
- Original Wiki Rulesheet hosted on Tilt Forums
Dungeons & Dragons: The Tyrant’s Eye is the fourth Brian Eddy-designed pinball machine following his return to Stern in 2019. Tiamat, a once-banished five-headed dragon, plans to spread darkness across Faerun. Players choose their class and embark on a journey to stop the threat. This machine features the PinSave feature, allowing players to resume playing from where they left off last game if they are using Insider Connected.
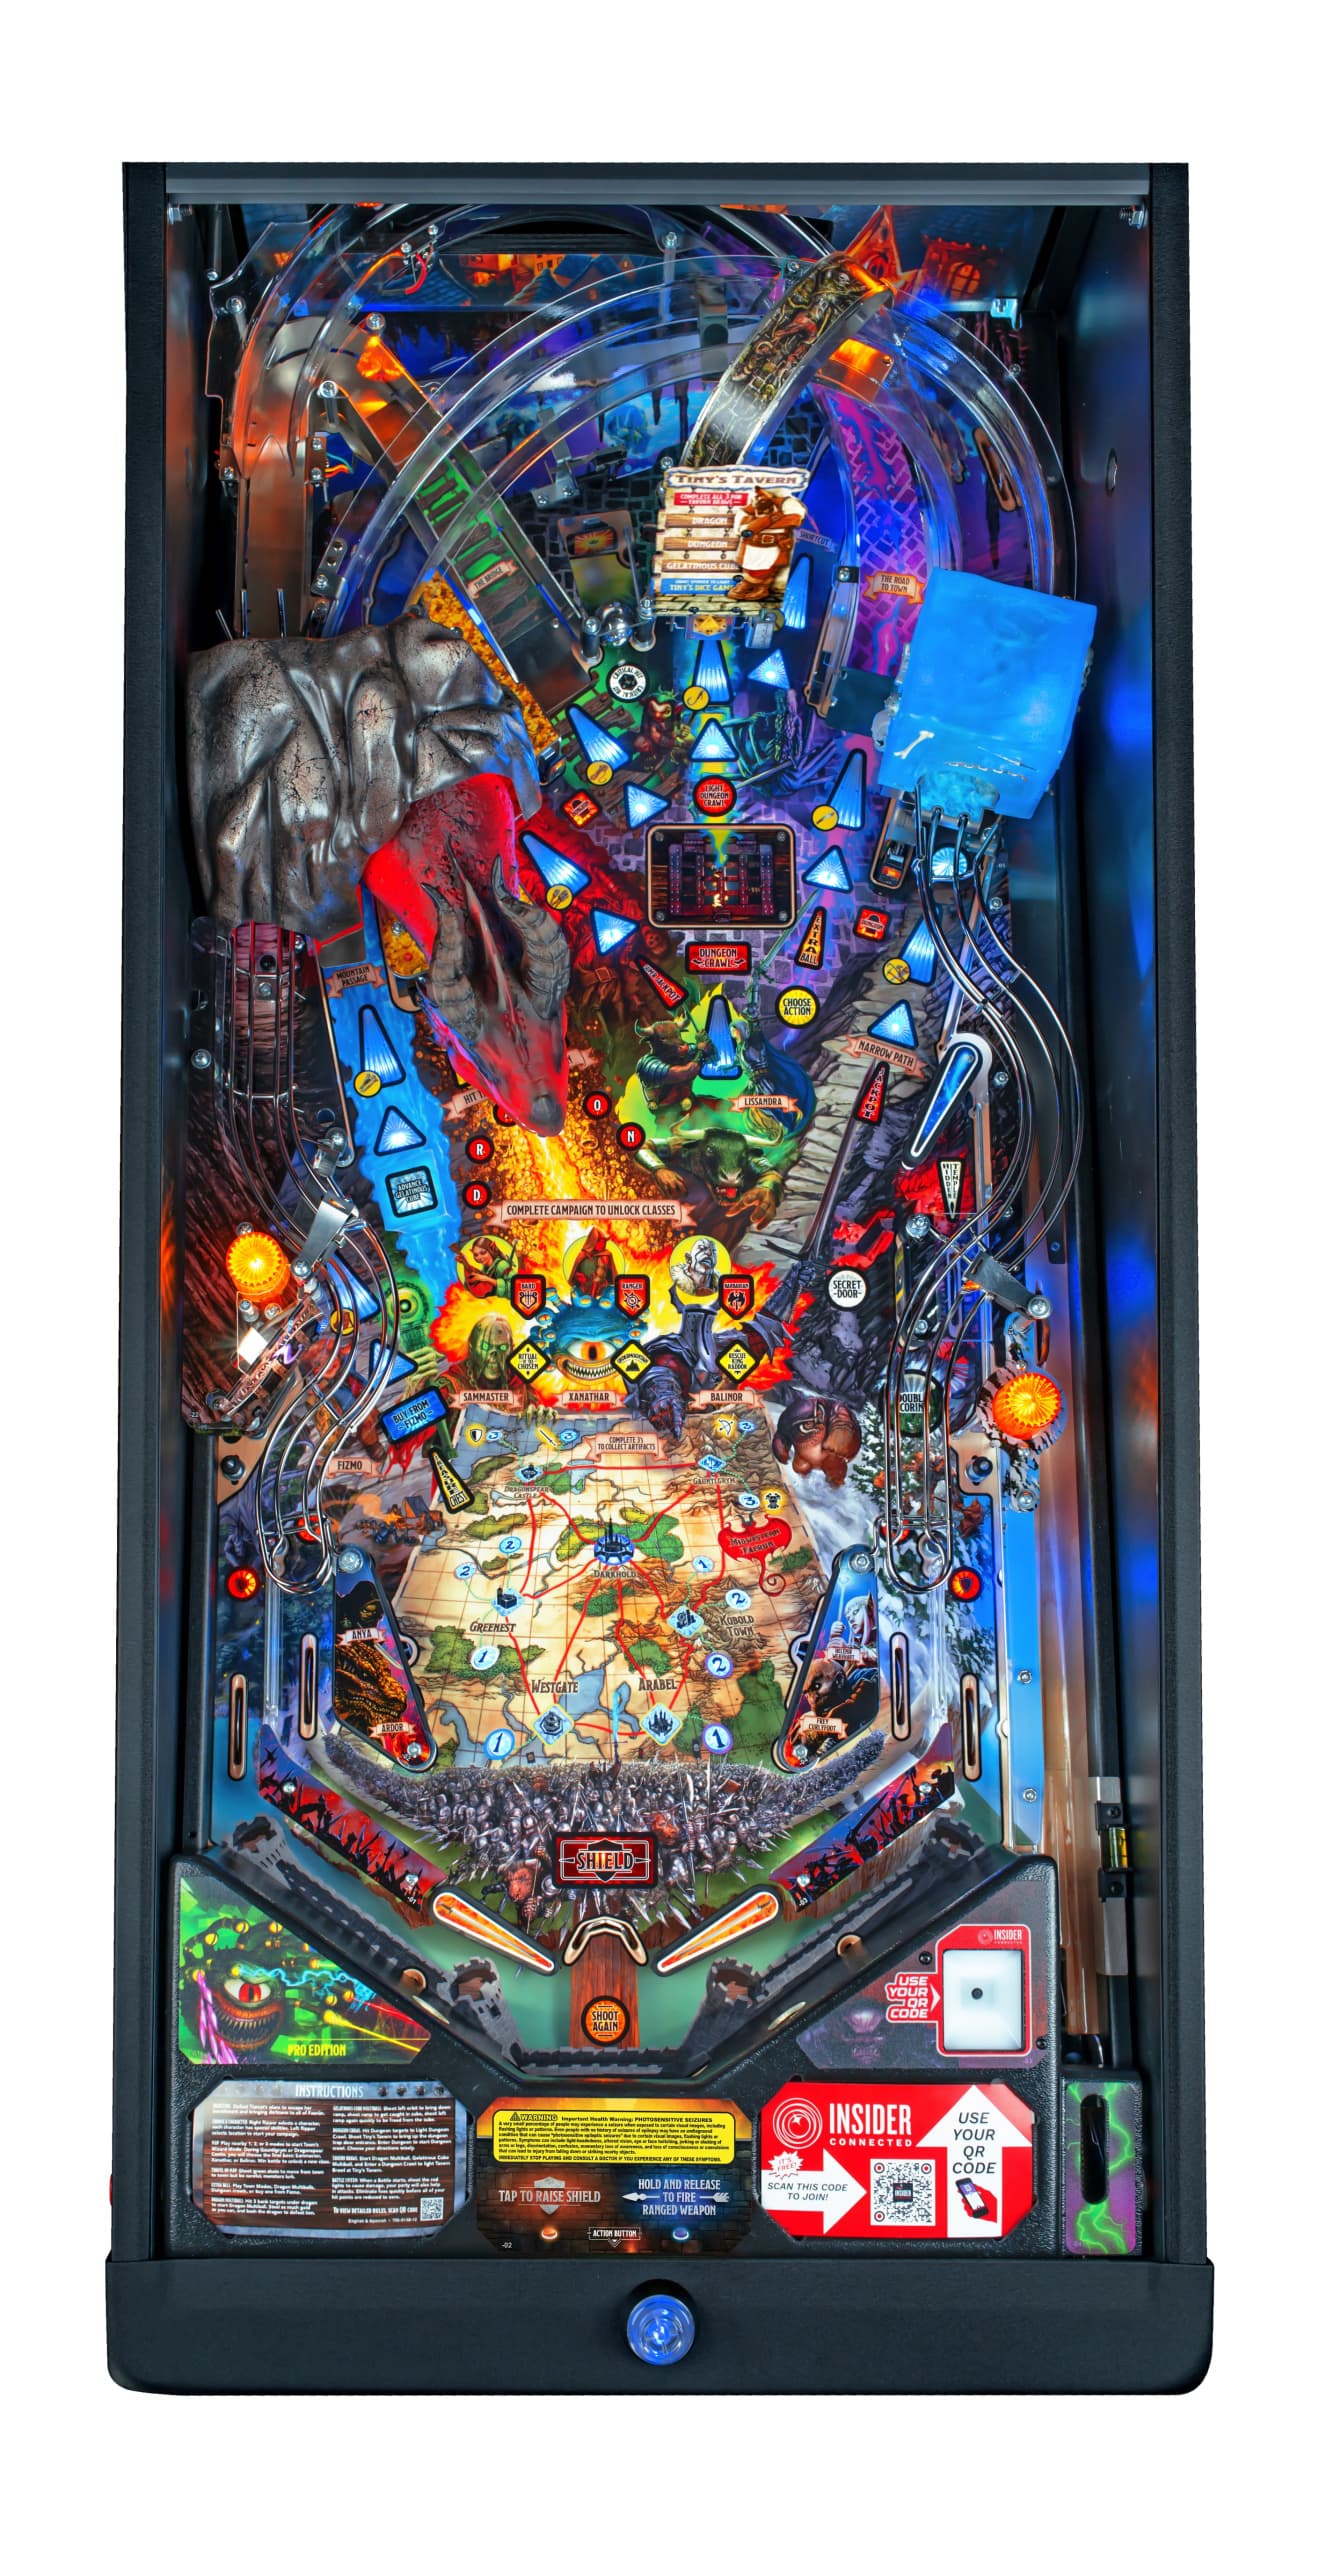
Layout:
Pro
Premium/LE
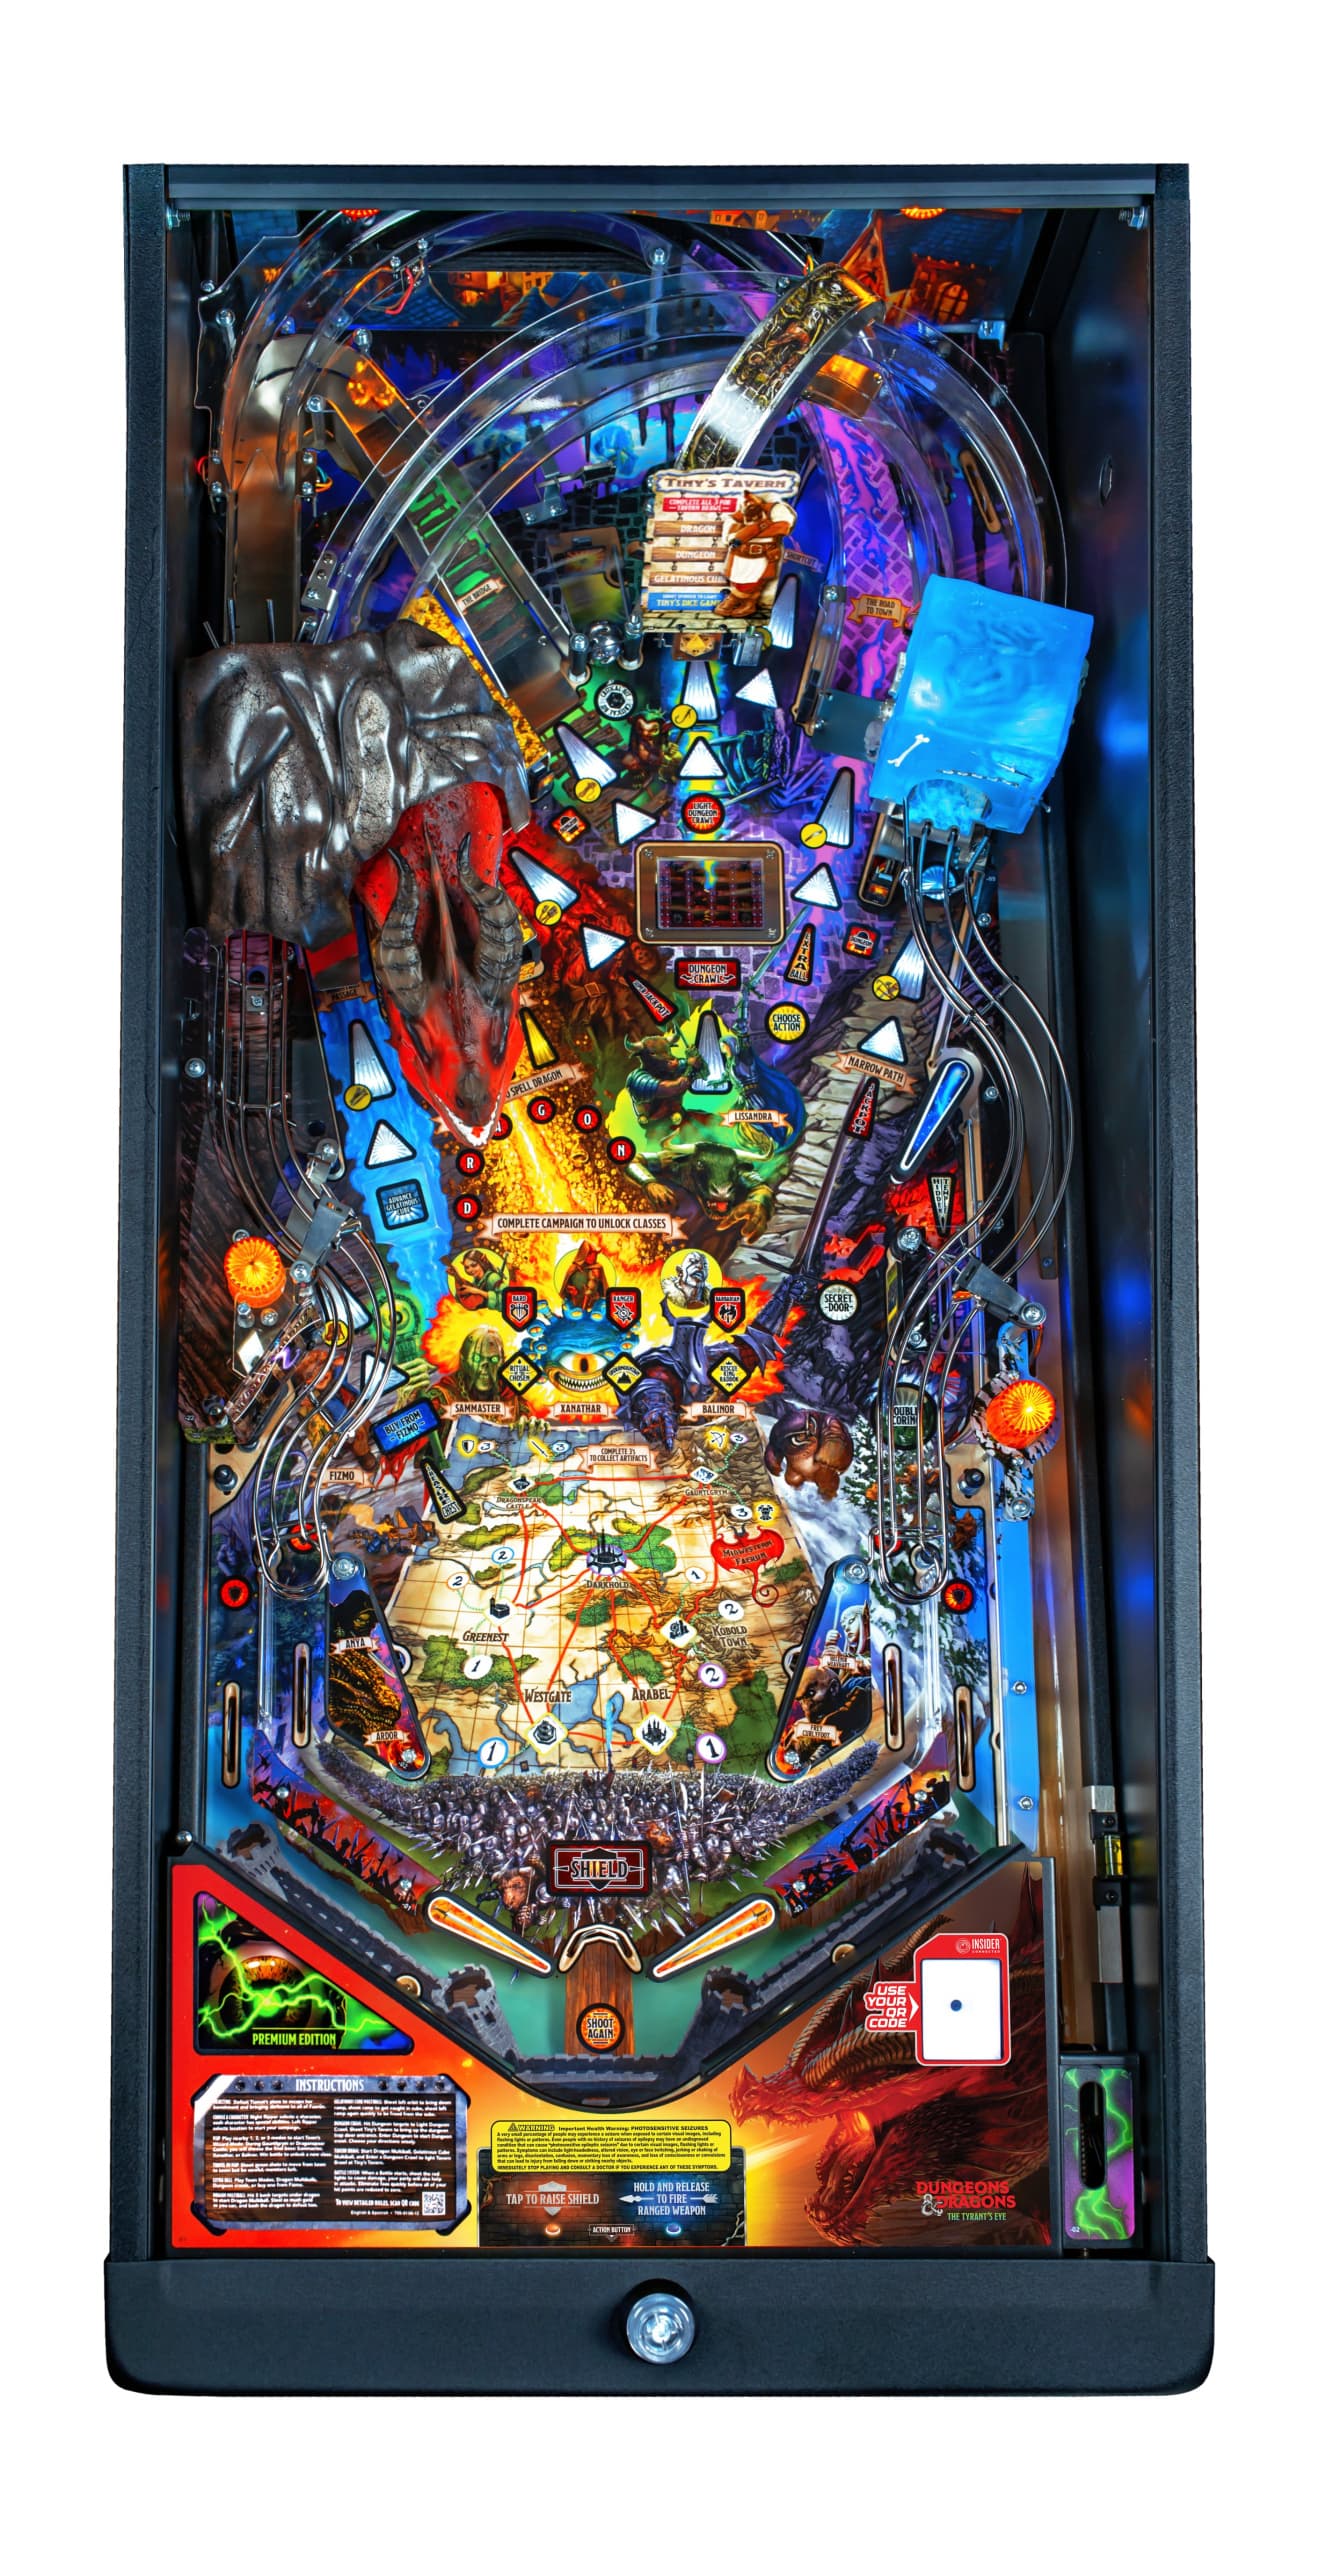
Playfield features exclusive to the Premium/LE models include:
- Rath dragon head has two axis movement instead of up/down.
- Rath sculpt will eject pinballs during Dragon Multiball.
- A pop-up scoop will raise out of the playfield to capture a ball and start Dungeon Crawl mode, and as a featured shot in other modes.
Modes of Play:
These modes are accessible by holding both flipper buttons during attract mode until a menu appears. The following options are available:
- Standard: Standard play starts a new campaign. Players logged into Insider Connected can resume a saved campaign for a character, or use the saved character in a “one-shot” new campaign by holding the action button on the character select screen. One-shot campaign progress is not saved. See sections below for full game rules/details.
- Competition: No saved progress. All legendary equipment is disabled. Uses a constant random seed.
- Cooperative/Team Play: Players can play in different team player count configurations (1v3, 2v2, etc.) with shared team scores. Participants that log into Insider Connected can use saved characters from their account, although campaigns always start at the beginning and do not save progress. The first player of the team selects the starting city for the rest of the team’s players.
- DJ Mixer: NOT a gameplay mode. This mode operates like a jukebox, allowing you to play the music featured in the machine, including a number of specific playlists.
- Reset Progress: Clears saved campaign progress, item upgrades, and sets level 1 for all characters for the scanned Insider Connected account. Also removes access to Bard / Ranger / Barbarian. This is recommended after game code updates for balancing changes, although this is not required and characters are currently backwards compatible.
- Prolonged Competition Install: Competition mode default game mode till next reboot.
Character Selection / Leveling Up:
Select a character at the start of the game by using the right flipper button to cycle through the available options. Each character is assigned a fixed class.
Characters will level up automatically as they gain experience points (XP). This is typically through completing battles, finding treasure, and completing modes/quests. The other three members of the player’s party are level-matched to the player’s character. Equipped items are “copied” to the other party members, although they only impact the Armor Class (AC) or ToHit rolls of the rest of the party.
| Character | Class | Perks | Base Stats | Str/Dex/Con/Int/Wis/Cha |
|---|---|---|---|---|
| Ardor | Dragonborn Paladin | Bonus damage to dragons | 11 HP, 16 AC, 15% Luck, 120 Gold | 18/13/13/11/17/13 |
| Anya | Halfling Rogue | More Luck / Treasure | 9 HP, 16 AC, 40% Luck, 130 Gold | 14/18/13/11/15/12 |
| Frey Curlyfoot | Dwarf Cleric | Bonus damage to undead enemies | 11 HP, 18 AC, -15% Luck, 110 Gold | 16/14/16/12/19/9 |
| Helenir Weavhart | High Elf Wizard | Longer Shield Timer | 7 HP, 13 AC, 15% Luck, 140 Gold | 13/16/12/16/13/12 |
Unlock additional characters by completing the campaign. These unlocked characters are not available in competitive play to prevent unfair advantages between players.
| Character | Class | Perks | Base Stats | Str/Dex/Con/Int/Wis/Cha | Unlock Mode |
|---|---|---|---|---|---|
| Rhyme | Tiefling Ranger | Good with Ranged Weapons (2 blue arrows at once) | 11 HP, 12 AC, 15% Luck, 140 Gold | 18/13/12/10/11/13 | The Undermountain |
| Juniper Amari | Wood Elf Bard | Increased 2x Scoring Timer | 9 HP, 15 AC, 60% Luck, 160 Gold | 11/15/13/13/13/18 | Ritual of the Chosen |
| Goregath | Goliath Barbarian | Rage (replaces ranged weapons, collects all lit shots once per ball) - can be repurchased from Fizmo’s for 300 gold). Extra damage to Abashi & Yugoloths | TBD | TBD | Rescue the King |
| Rowan Freewander | Human Fighter | TBD | TBD | TBD | Unlocked with topper connected |
The stats are described in the status report as follows:
- Strength: Increases damage dealt.
- Dexterity: Increases armor class.
- Constitution: Increases HP.
- Intelligence: Increases damage from spells (magic missile & fireball).
- Wisdom: Increases time for all timers.
- Charisma: Increases luck.
Insider Connected Save Features:
If the player signs in using Insider Connected, campaign progress with the selected character is automatically saved. Each character’s stats, items, and campaign progress are saved separately. Character level/items/stats are not “shared” between separate campaigns. The legendary equipment earned through later levels of dungeon crawl also disappears once the game ends regardless of whether the player is signed in.
Logged in players can choose to start a new campaign with a character that does not have a saved campaign, resume a character’s saved campaign progress, or hold the action button to do a “one shot” and start a new campaign with the saved character from the beginning without saving progress.
For the cooperative game mode, each player’s party members are level and item matched to their selected/loaded character just as if they were playing solo.
Skill Shots:
- Short plunge and hit the upper loop.
- Short plunge and hit the switch near the gelatinous cube, either directly by shooting the shortcut loop or with a well-aimed plunge.
- Super skill shot: hit the left eject, then side ramp, then right ramp.
- MXV skill shot: hit the hidden temple shot behind the upper flipper.
The skill shot value is 2M x a multiplier equal to the ball it was collected on (extra balls add +1x to the multiplier). The super and MXV skill shots start at 6M.
The Campaign Map:
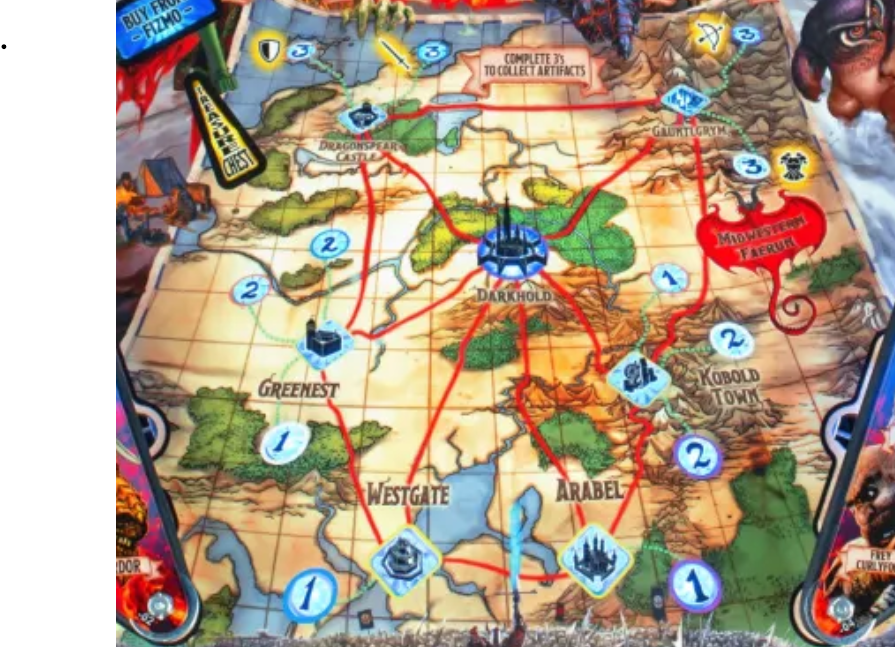
The overall campaign progress and the party’s location are represented by the map of Mid-West Faerûn from the Forgotten Realms setting and the inserts on the playfield located between the slings. The player selects a starting location for their party at the beginning of a new campaign by pressing the left flipper button to cycle through the location options while selecting their character/class. Players can choose to start in Greenest, Westgate, Arabel, or Kobold Town, with the corresponding city insert flashing yellow on the map.
When resuming a saved campaign, a location can’t be selected; the party automatically starts in the last city visited at the end of the previous game.
Plunging the ball will start or resume the campaign with the currently selected character and the selected/last location.
Town Quests/Modes
The quests/modes at each location are depicted using “1”, “2”, and “3” inserts with an Orange, White, Blue, or Purple border. The player must travel between cities to complete the color matched level 1 and 2 modes in either order to unlock the same color level 3 mode in Dragonspear Castle or Gauntlgrym.
Town Dungeons
Once all of the leveled quests at a location are completed, the player can start the location’s Town Dungeon. Town Dungeons are multiple phase modes, and lock the player out of any multiballs or other features that they could otherwise start during the prior quests.
After completing each phase of the Town Dungeon, players can hit green shots to heal if they have taken damage and have healing potions, or hit the center spinner shot while the yellow arrow is lit to advance to the next phase. The arrow will timeout after a period of time, which can repeat the prior phase or require hitting a dragon target to relight.
A treasure chest is lit at the left kickout after each Town Dungeon phase.
Completing any Town Dungeon qualifies Darkhold for a bonus round.
Quest completion
Completed modes and cities are lit solid red if the mode/dungeon was failed or green if it was cleared successfully. There are currently no penalties for failing most campaign modes, but if the player loses a level 3 mode, they will miss out on their associated artifact. Fizmo can give 2nd chances on any artifact that the player failed to obtain.
Note: Completed modes cannot otherwise be repeated whether completed or failed!
Location Quests / Modes:
Greenest:
The Orange and White town quests/modes in Greenest have two options. Players can choose to do either the White 1A or 1B, and Orange 2A or 2B options, but not both A and B options for the same color in the same campaign. There is no main advantage or drawback with either option.
- (White 1A) Attack the Dwarves - Attack the dwarves to help Balinor
- Battle with Dwarves. Hit red shots to damage dwarves, or white shots to collect Ore.
- (White 1B) Remove the Dwarves - Escort the dwarves out of town to help Balinor
- Battle with Yuan-Ti. Hitting red shots will damage Yuan-Ti, and white shots will rescue dwarves.
- (Orange 2A) Help Kobolds Defend the Caravan - Stop the Yuan-Ti from taking the caravan
- Battle with Yuan-Ti. Hitting red shots will damage Yuan-Ti, and orange shots will collect Ore.
- (Orange 2B) Attack the Kobold Caravan of Ore - Help the Yuan-Ti take the caravan from the Kobolds
- Battle with Kobolds. Hitting red shots will damage Kobolds, and orange shots will collect Ore.
- (Blue 2) Abandoned Farm - Investigate the strange activities
- Investigate the farm by clearing shots lit with blue arrows. Clearing a shot will find nothing and award points for the first 3 shots, then find monsters and start a 2-phase Nothic battle.
Town Dungeon:
- Undead Cult of the Dragon
- Phase 1 - Battle with Cultists.
- Phase 2 - Shoot the dragon 3-bank to light yellow shots to search through the dungeon. After three yellow shots, the center spinner can be hit or the player can keep scoring yellow shots.
- Phase 3 - Battle with Cultists.
Travel Destination Options: Dragonspear Castle, Darkhold, Westgate
Westgate:
- (Blue 1) Zombie Sailors - Stop the zombies from attacking Westgate
- Single phase battle with zombies
Town Dungeon:
- Trouble on the Dock - Investigate what is happening on the galleon
- Phase 1 - Battle with Yuan-Ti on the docks. Killing a Yuan-Ti will light the dungeon shot to advanced to the next phase.
- Phase 2 - Battle with Yuan-Ti Malison in the galleon. Collecting three pieces of gold ore at the yellow shots will light the dungeon shot to escape and finish the mode.
Travel Destination Options: Greenest, Darkhold, Arabel
Arabel:
- (Purple 1) Retrieve a Potion for Nighdaar - Help Nighdaar with the war of dragons
- Series of 3 hurry up shots. Starts at the middle spinner shot, then left orbit, then side ramp. If you wait long enough the shots will “spread out” in each phase.
Town Dungeon:
- The Crypt Beneath the Temple of Tymora - Rescue Diego Stormbeard
- Phase 1 - Battle with ~13 Giant Rats, 3-4 initially, then shoot left orbit & right ramp to light dungeon shot. If the dungeon advance shot times out after the battle, the player must repeat the battle.
- Phase 2 - Battle with Gelatinous Cube. Shots move from right, to center, to left to deal damage. After defeating the Cube, shoot an orange shot to rescue Diego on a hurry-up timer or yellow shot to increase the value. Then end at a cyan shot.
Travel Destination Options: Westgate, Darkhold, Kobold Town
Kobold Town:
- (Orange 1) Rescue Missing Miners - Investigate why there are missing Kobold miners
- Battle with single Bulette. Hitting orange roaming shots rescues Kobolds and awards 5M + 500k points per Kobold. Defeating the Bulette or rescuing four Kobolds ends the mode.
- (White 2) Break Into the Kobold Vault - Help Balinor retrieve his missing breastplate
- Pass 30 seconds while shooting shots, or drain the current ball, to start a battle with a Spectator. After defeating the spectator and hitting at least 5 shots the cyan shots will light to complete the mode.
- (Purple 2) Spy On Puck - Nighdaar thinks something is going on in Kobold Mining Town
- Stealth Mission - All shots are lit with purple arrows. Mode completion requires hitting 10 purple shots. Hitting a shot will clear it for a period of time and light 2x progress for the next shot, and hitting slings reduces the stealth meter. Reaching 0% stealth starts a battle with two Kobold Guards and removes purple shots until the battle is complete.
Town Dungeon:
- Mystery at the Bottom of the Mine
- Phase 1 - Stealth Mission - Hit 4 shots, or start battle with Bulette if stealth is lost.
- Phase 2 - Battle with Xorn. One damage shot will roam around the playfield. Hitting a shot will stun the Xorn and prevent the shot from moving for a period of time.
- Phase 3 - Destroy the Obelisk/Gargoyle battle. Battle starts with two Gargoyles. Gargoyles will continue to individually respawn into the battle, progressively getting more powerful each time. Switch hits will light the center spinner to do damage to the obelisk. Requires 10, then 50, and another 50 switch hits. Three hits to the Obelisk completes the mode successfully.
Travel Destination Options: Darkhold, Arabel, Gauntlgrym
Darkhold:
Travel to Darkhold must first be enabled by completing any town dungeon mode.
- Bonus Round: Goblin Portal - Fight an infinite number of goblins. The bonus round has an unlimited ball save and behaves the same way as a normal battle would. The mode only ends if you tilt out of it, or if all four of your party members die.
Travel Destination Options: Dragonspear Castle, Gauntlgrym, Greenest, Kobold Town, Westgate, Arabel
Dragonspear Castle:
- (Orange 3) - Prison Break
- Phase 1 - Battle with undead dragonborn
- Phase 2 - Shoot the center spinner to light shots. Hit four lit shots before the timer expires to complete the mode successfully and award dragon heart shield.
- (Blue 3) - The Graveyard of Dragonspear Castle
Town Dungeon:
- The Lich of Dragonspear Castle - Work your way down to Sammaster’s Lair and defeat him
- Phase 1 - Battle with two Trolls in two waves. Hit yellow shots to set a trap for 500k, and then the blinking dungeon standup to damage the troll. Hitting the Critical Hit captive ball twice spots a trap set shot. Requires two trap sets to defeat a Troll, they do not die to standard red shot damage or ranged attacks. It is also possible to set both traps before triggering to kill a Troll faster. The dungeon shot will light after both trolls are defeated. Hit a dragon stand-up target to relight the dungeon shot if it times out.
- Phase 2 - Battle with X skeletons. All shots are lit red. Hitting a shot either instantly defeats a skeleton decoy and awards 5,000 points, or does damage to the real skeletons. Watch the arrows to see which shots flash to attack to identify the actual skeletons. The “real” skeletons are able to attack, and can move after each attack. Phase completes after 4 non-decoy skeletons are defeated.
- Phase 3 - Ranged battle with Abishai. Start the mode by hitting the red shot with a ranged attack. Hit the yellow shot on the left kickout to load a silver arrow, then hold the action button to hit the red shot with a ranged attack. Then hit the left orbit for the Gelatinous Cube ramp, and a second ranged attack on the right orbit to finish the battle and advance to the next phase.
- Phase 4 - Battle with the Lich Sammaster. Shoot flashing dragon or dungeon standup targets to do a “Perception Check” for the nearby shots or blindly shoot shots to guess his location. Arrows will flash red if the Lich is there or white if not. Sammaster will disappear and move after dealing damage.
- Phase 5 - Players are presented with options to “Stay and fight Sammaster” or “Go after the scepter”:
- Stay and fight Sammaster - Continue the battle with Sammaster. Defeating Sammaster qualifies The Undermountain once the battle ends.
- Go after the Scepter - Battle with one wave of 3 Yugoloths. Defeating the wave will qualify Ritual of the Chosen once the battle ends.
Finishing the Sammaster fight or getting the Scepter completes the mode, returns the party to town, and lights 3 blue shots to begin the selected wizard mode.
Travel Destination Options: Gauntlgrym, Greenest, Darkhold
Gauntlgrym:
- (Purple 3) - Slaad Assassin
- Phase 1 - Battle with Red Slaad
- (White 3) - Acquire the Lifeblood Armor
Town Dungeon:
- The Battle of Gauntlgrym - Stop Balinor from capturing King Raddok
- Phase 1 - Battle with Zhent Soldiers. The longer you take to defeat them the more powerful they get.
- Phase 2 - Battle with Red Slaad. Every time the enemies attack they will move positions and regenerate health making them tougher to defeat.
- Phase 3 - Battle with Hobgoblins. Hobgoblins that spawn closer to each other on the playfield will deal more damage than those a farther distance away.
- Phase 4 - Players are presented with options to “Stay and help Nighdaar” or “Help King Raddok”:
- Stay and help Nighdaar - Battle with one wave of Minotaurs. Rescue the King is qualified once the battle ends.
- Help King Raddok - Battle with one wave of Skeleton Minotaurs followed by a battle against Balinor. Skeleton Minotaurs will respawn if one isn’t killed before the other. If the player failed Acquire the Lifeblood Armor they will need to destroy the armor first before attacking Balinor directly. Balinor fires firebolts from his gauntlet every few seconds dealing additional damage to the party. The Undermountain is qualified once the battle ends.
Finishing off the Minotaurs with Nighdaar or defeating Balinor completes the mode, returns the party to town, and lights 3 blue shots to begin the selected wizard mode.
Travel Destination Options: Dragonspear Castle, Darkhold, Kobold Town
Traveling Between Locations:
The player starts the game in travel mode, with the party moving to the location that they pressed with the left flipper at the start of the game. During travel mode, some shots are lit with blue arrows. Shots will randomly spawn enemies, with more difficult ones spawning in the Underdark if the player is headed to Dragonspear Castle or Gauntlgrym. The enemy difficulty increases for players who are past level 7. Hitting three blue shots, killing all enemies in the battle, entering the Dungeon Crawl, or draining will exit travel mode and put the party in the new location.
Once the player reaches the city, they can re-enter travel mode by a shooting yellow “choose action” shot (the same way they would start a location mode), and selecting the city they want to travel to.
Battles:
Battles are the meat of the game and the main way of leveling up your characters. Many of the location modes revolve around battles for their duration, and the player can also encounter random enemies if they are traveling or exploring a dungeon.
To start a battle, shoot a yellow “choose action” shot and then select a battle. During battles, shoot red shots to deal damage. Your party has four members, including your character, and every time you make a lit red shot, each member of the party rolls a D20 to determine the damage output of the shot.
The red arrows will start to flash and progressively get faster to indicate when a monster is about to attack the party to deal damage. Party members will be eliminated and removed from combat if they reach zero HP from taking too much damage. Town modes will end in failure if all four of the party members are wiped out in a battle.
Ranged Attacks (Action Button):
To deal long-ranged damage, hold the action button. A blue arrow shot will begin moving from the left to right side of the playfield and back. When the button is released, the lit shot at the time that the button was released will be spotted. This rule only applies to battle damage, and cannot be used to spot shots in any other ongoing modes.
Reload: Reload the ranged weapon by making a successful shot to any lane or ramp (whether lit or unlit).
Powerups: The items below can upgrade the ranged attack’s damage and accuracy.
- Ranged Weapon of Accuracy: the roving reticle slows down.
- Oculus Bow of True Aim: Multi-shot spread. The shot covers two lanes instead of one.
- Glass Bow of All-Shot: Applies to all 8 lanes. Can be used 10 times before it expires (up to 20 if found twice).
Note: as the Wizard, no ranged weapons can be purchased or upgraded from Fizmo. As the Barbarian, ranged weapons are disabled and the game will make an effort to never give any ranged weapons.
Stealth Missions:
Stealth missions are a special type of mode that requires performing certain actions with a stealth meter. Stealth mechanics are used in the following quests: Spy on Puck (Purple 2), phase 1 of Mystery at the Bottom of the Mine (Kobold Town Dungeon), and phase 1 of Rescue the King.
The meter starts at 100% stealth and decreases each time the ball hits a sling. The decrease amount per sling hit varies by class. From highest to lowest is the Barbarian, Cleric, Paladin, Wizard/Bard, Ranger, then Rogue with the least reduction per sling hit.
If the stealth meter reaches 0%, a battle starts which pauses the main objectives until the battle is completed. Battles are only triggered once per stealth mode, so successfully completing the battle will allow unhindered main objective completion.
Dungeon Crawls:
Light dungeon crawl by hitting the Dungeon standup targets near the right orbit and side ramp, or spot targets by hitting the center spinner. Once lit, start the dungeon crawl mode based on the table model:
- Pro - Hit the spinner again within 15 seconds.
- Premium/LE - Hit the spinner to raise the ball capture mechanism for 15 seconds. Hitting the ball capture starts the mode.
Dungeon crawl starts with a 20-second long ball save. To explore the dungeon, shoot the flashing orange shots to move forward or purple shots to reach a direction choice. For each direction choice, the player can choose between the two or three presented door or hallway options using the respective flipper or action button.
Choosing a direction will discover one of the following:
- A hallway requiring hitting an orange shot
- Another intersection requiring hitting another purple shot
- Enemies triggering a battle. Losing the battle causes the party to be ejected from the dungeon. Defeating all of the enemies in the room allows the player to move on and lights a treasure chest for collection at the left eject.
- A trap (Awards points and ends the mode)
- Award room (Awards Points / XP / extra ball (on 1st level only) and ends mode)
- Treasure room (Awards legendary equipment based on level it was found on, and ends mode; only found on levels 2 - 5)
- Stairs down to the next level (Awards points, mode continues on the next level with +20 more seconds of ball save)
There are 5 total levels of dungeon crawl, with procedurally generated layouts that reset every Sunday. Finding the treasure room in levels 2, 3, 4, or 5 of dungeon crawl awards a legendary artifact; the order they are given in resets along with the layouts every week.
If the player drains during dungeon crawl, their progress will be saved. The player will be placed close to where they were when they drained whenever they start dungeon crawl next in the same game.
On competition mode, the player can only start one dungeon crawl per ball in play.
Multiballs:
Dragon Multiball / Town Celebration Multiball:
Hit the 3-bank standup targets under Rath to spell DRAGON to light this multiball at the right orbit and side ramp (the latter shot is only lit when no other modes are running). The first time it is started in a game, letters will be spotted for every 2 3-bank targets completed. Afterwards, all three must be hit to spot a letter. The current Dragon Multiball level per party member is saved via Insider Connected, and maxes out at level 10.
Dragon Multiball is a 6 (Pro) / 8 (Prem / LE) ball multiball mode with an unlimited ball save. One shield use is added as soon as the multiball starts. The player must hit Rath the listed number of times before enough balls drain. Playing as the Dragonborn, Ardor, reduces the amount of shots it takes to defeat the dragon. Every dragon defeated will increase the player’s level by 1.
Starting at level 3, the trough behind the dragon on Prem / LE will hold balls to make the multiball slightly easier to control. Starting at level 6, the super jackpot on Prem / LE can only be scored by getting Rath out of the way of the upper loop and then quickly shooting the upper loop before his position resets.
Otherwise, every level acts the same way: shoot the 3-bank, then hit Rath to deal damage before his head raises back up again. For the entirety of the multiball, jackpots can be scored at the flashing shots for 1x, then 2x, then 3x value, with a super jackpot lit at the upper loop after scoring a 1x jackpot at each shot. The jackpots are worth 250k x the number of drains left before Rath wins and the super jackpot starts at 3M + (500k per level) + the combined value of all jackpots collected prior. Scoring a super jackpot also adds one shield use and deals damage to the dragon (1 hit x the current dragon multiball level, to a maximum of 6).
If the player fails to defeat Rath, the flippers are frozen to drain all balls in play, and the player’s party remains in the same town with a ball placed in the shooter lane and automatically plunged back into play.
If the player defeats Rath, the game immediately begins Town Celebration Multiball with the remaining balls still in play from Dragon Multiball. The two orbits, side ramp, and right ramp are lit for jackpots worth 500k x the number of jackpots collected during Dragon Multiball. Collecting them all lights the side loop for a super jackpot worth a 4x jackpot.
Draining down to one ball ends the Town Celebration Multiball. After completing Town Celebration Multiball, the next purchase from Fizmo will be 50% off its normal price for that town.
Gelatinous Cube Multiball:
Shoot the left orbit to lower the ramp at its entrance, then shoot the left ramp. This must be repeated 1-4 times, with the same ball, before it will be held at the gelatinous cube magnet.
The amount of shots required can be set by the operator and defaults to medium:
- Easy: 1 shot
- Medium: random value of 1-4 that stays the same for an entire week
- Hard: 4 shots
Once ball 1 has been stuck, a hurry-up value will start decreasing from 5M. The player can either start the multiball by releasing the locked ball, or lock another ball and increase the hurry-up value by 5M by shooting the right orbit. Then, the player can either start multiball or add a fourth ball to the multiball by hitting the left ramp again as the final shot.
During gelatinous cube multiball, four shots are lit at a time for jackpots: these can include the two orbits, upper loop, side ramp, or right ramp. Each jackpot is worth the scored hurry-up value, which increase by 3M per each jackpot scored to a max of 25M. Collecting them all lights the side loop for a super jackpot worth a set 20M and resets the process.
After playting gelatinous cube multiball, it must be requalified by completing any map mode.
Other Scoring:
Critical Hits:
Hitting the captive ball target will start it flashing for 15 seconds. Hitting it again will award a critical hit and give various perks to the player:
- If they are in a mode, battle or otherwise, it will spot a lit mode shot or damage shot. Damage shots take priority over mode shots. It won’t spot final shots during modes or intersection shots during dungeon crawls.
- It will collect one letter towards dragon multiball if dragon multiball can be advanced.
- It will advance one shot towards gelatinous cube multiball if the left orbit ramp isn’t lowered, and gelatinous cube multiball can be advanced.
- It will advance towards starting 2x scoring, but will never start it.
Healing Potions:
Party members will take damage in battle modes as monsters attack. The party is automatically healed when they reach a city or after a mode is completed.
However, if the party has healing potions, they can be used during multi-phase Town Dungeons to restore HP by shooting green shots between phases/levels before moving to the next level. The player can store up to 3 healing potions at a time, and HP healed is impacted by class and level:
- Paladin gets a small bonus to healing amount.
- Cleric heals for the max amount.
- High level characters earn double healing.
A green potion icon on the UI indicates the number of available healing potions carried by the party. Healing potions are collected via:
- Starting the Town Dungeon in Westgate, Greenest, Dragonspear Castle, and Kobold Town will give you 3 potions.
- You can buy 3 Potions from Fizmo if offered.
- Some treasure chests give 3 potions.
Belongings:
Every shot on the playfield corresponds to a different belonging. Each belonging adds 10k to end-of-ball bonus, and collecting full sets of belongings adds 100k to end-of-ball bonus. Full sets of belongings can also be purchased from Fizmo.
Shooting the upper loop repeatedly will spot one belonging towards completing the current set.
Gems:
During single-ball play, if the player can currently advance towards starting Dragon Multiball, every dragon target hit will award 1, 2, or 3 gems. 10 gems can also be bought from Fizmo. Gems score 10k each in end-of-ball bonus, and collecting 50 gems over the course of the game will light the extra ball at the right ramp.
Fizmo (Shopkeeper):
Earn gold by winning battles, shooting the yellow triangle shots left behind by defeated enemies, and opening up treasure chests found in town dungeons or Dungeon Crawls.
If the player is in a town (ie. not in a dungeon, mode, or traveling) and has enough gold to purchase an item in the shop, they can shoot the left eject to shop at Fizmo’s. Each town’s shop will contain a set of purchase options from the following lists, with the medium and big items split across all seven locations (so one item from both lists):
“Small Items”:
- Light Dungeon Crawl
- Start Dungeon Crawl
- Spot DRAGON Letter
- 3 healing potions
- Bump Mimic Hurry-Up value (currently does nothing)
- Spot Secret Door
- Start 2x Scoring
- +1x Bonus Multiplier
- +3x Bonus Multiplier
- Bump Tiny’s Dice Game spinner value by +50k
- Bump Tavern Brawl jackpot value by +100k
- ??? (give any random item from any list)
“Medium Items”:
- Magical Weapon - Melee
- Magical Weapon - Ranged
- Magical Armor
- Artifact 2nd Chances (allows the player to retry modes at Dragonspear or Gauntlgrym that they failed)
“Big Items”:
- Trinket (gives you a choice between 2 permanent perks for your character)
- +10 Gems
- +10% Score
- Light Extra Ball
- Light Tiny’s Dice Game
- Light Tavern Brawl
- ???
The player can also opt out of making a purchase by selecting the “Pass” option, in which case Fizmo’s will relight the next time the player earns gold. Items will be covered with a “Sold out” indication if the character has reached the purchase limit for that item.
The prices are halved for the next visit if a player completes dragon multiball, then visits Fizmo. If the player chooses the same item more than once in a game, their gold price will subsequently increase by 10%.
Each town has a different fixed set of items that are updated every Sunday.
Treasure Chests / Mimic Hurry-Up:
Treasure chests can be lit at the left eject in various ways throughout the game:
- Completing a battle phase during any town dungeon mode
- Defeating all the enemies in a room during dungeon crawl
- Choosing “light treasure chest” from Fizmo’s
Every treasure chest awards small points and typically, a variety of items. These can include gold, gems, healing potions, and / or equipment.
Rarely, the treasure chest will turn out to be a Mimic, which starts the Mimic Hurry-Up mode. Slay the Mimic and reap the chest’s awards by shooting the left eject once more before time runs out. The hurry-up score starts at 50M.
Equipment:
Earn equipment by finding it in treasure chests, or by selecting them from Fizmo’s if he has magical weapons, magical armor, or trinkets for sale.
There are various different modifiers for equipment based on their “flavor”. For instance, an item “of Tymora” would increase the player’s luck and result in higher amounts of gold gained from treasure chests. The modifiers are listed below:
- Constitution: Increases HP stat / player’s max health.
- Dexterity: Increases armor class stat / reduces damage dealt to the player.
- Charisma and Tymora: Increase luck stat / likelihood of better awards from treasure chests.
- Strength and Blood: Increase strength stat / damage dealt to enemies.
- Vitality: Increases damage dealt to undead enemies (cultists, skeletons, etc).
- Accuracy: Reduces the speed that the ranged weapon blue arrows move at.
- Power: Increases the time the shield stays up for.
Legendary Equipment:
Legendary equipment can be earned by reaching levels 2, 3, 4, or 5 of dungeon crawl, then finding the treasure room hidden within any of those levels. The order that these four pieces of equipment are given in resets along with the dungeon crawl maps every Sunday.
All legendary equipment gives the player 10 uses by default, and up to 20 can be stacked; once the uses have been depleted the character’s legendary equipment will revert to the highest level one they currently have of the current type. They only last for the duration of the current game, and are not saved via Insider Connected.
- Glass Sword of Unmaking: One-shots all non-boss enemies during battles.
- Glass Bow of All-Shot: Using the ranged weapon will apply hits to all shots instead of just one or two.
- Glass Armor of Immortality: The next damage dealt by an enemy is negated.
- Glass Shield of Endurance: The shield stays up for twice as long.
Artifacts:
Players can collect artifacts by completing level 3 missions in Dragonspear Castle and Gauntlgrym.
- Dragon Heart Shield: Unlocks after completing Prison Break (Orange 3). You can now save up to five shield uses at once instead of the normal cap of two.
- Mercy the Broadsword: Unlocks after completing The Graveyard of Dragonspear Castle (Blue 3). All damage dealt to enemies during battles now deals double damage and heals the player by half of the damage dealt with each shot.
- Oculus Bow of True Aim: Unlocks after completing Slaad Assassin (Purple 3). The ranged weapon now covers two shots instead of one and deals greater damage.
- Lifeblood Armor: Unlocks after completing Acquire the Lifeblood Armor (White 3). Adds a permanent +2 to your current armor class, and damages enemies that attack you by half of the damage that they dealt.
If the player failed in collecting any artifact, Fizmo can offer 2nd chances to obtain them.
Hidden Temple (2x Scoring):
Light the hidden temple by shooting the “secret door” bar target in front of it, or by hitting the hidden temple itself, two times; once to start the target flashing, then again in 20 seconds. When lit, shoot the hidden temple to start timed 2x scoring for 20 seconds.
Shoot the secret door or hidden temple again while 2x scoring is running to extend the timer by +5 seconds.
Shield (Ball Saver):
The shield is a unique metal bar located between the flippers that saves balls headed straight down the middle. It is activated by pressing the action button when flashing.
Flipping a pinball stopped against the left or right side of the shield will often hit the right ramp or left orbit, respectively.
Relight the action button/shield insert by lighting the set of 4 return lane inserts enough times. 1 return lane completion is required for the first shield increasing by 1 each time, to a maximum of 5.
Normally the player can only save up to two shield uses at a time, but if the Dragon Heart Shield is in their possession up to five can be saved. The Glass Shield of Endurance also extends the time that the shield is raised to 2x its normal length.
Extra Balls:
Light extra ball at the right ramp by:
- Starting two map modes
- Finding one in a dungeon crawl
- Playing Dragon Multiball 3 times
- Buying one from Fizmo
- Collecting 50 gems
End-of-Ball Bonuses:
- 100k points per town mode completed
- ?k per dungeon crawl
- ?k per multiball played
- 10k per gems
- 10k points per belongings collected, 100k per set
Wizard Modes:
Tiny's Dice Game (Mini-Wizard Mode):
Qualified by buying from Fizmo in a town shop, or by starting three modes (either numbered modes or town dungeons). Once lit, shooting the center spinner starts the timed mode.
Hitting the center spinner collects the spinner value (25k per spin). All other shots are lit to add a small amount of time and increase the number on the dice, and are cleared when hit or when the die reaches 20. The maximum value of a spin (excluding bumps that were awarded from Fizmo is 500k (25k x 20).
Prem/LE Only - The dungeon entrance will pop up and down during the mode. Hitting the entrance will increase the spinner value.
Tavern Brawl (Mini-Wizard Mode):
Tavern Brawl is a two ball multiball mode qualified after completing all of the following:
- Starting dragon multiball
- Starting gelatinous cube multiball
- Starting a dungeon crawl
Once qualified, the mode starts by hitting the center spinner when no other modes are running.
Shooting the center Tavern shot three times will enable 1x, 2x, and 3x Jackpots on the left ramp for about 30 seconds. Every time the looping ramp is lit, one additional tavern shot will be needed to light it than before.
The left eject, orbits, and ramps award jackpots starting at 4M + 200k per jackpot.
Hit the bank of three gold standup targets to spell DRAGON. Completing DRAGON will light the right “shortcut” loop one time to add a ball to the mode and light the super jackpot at the upper loop, one time only.
Prem/LE Only - DRAGON isn’t required to light the super jackpot, just the add-a-ball. Instead, after hitting any dragon shot, the dungeon shot will raise for a short time. Hitting the dungeon shot lights the super jackpot.
Ritual of the Chosen (Bard Unlock):
Ritual of the Chosen is a wizard mode located in Dragonspear Castle that is available after clearing the Town Dungeon mode, The Lich of Dragonspear Castle. After finishing the Town Dungeon, the side ramp, center shot, and right ramp are lit blue to start this mode.
The mode is a repeating set of tasks across 5 dragon battles. Each level/battle starts with a 15 second timer and unlimited ball saver, where drains subtract 8 seconds from the timer. Shooting green lit shots will “lock” pinballs for the next mode and extends the timer. Starting with level 2, green shots will also heal your party.
Once the timer expires, the ball save stops and a multiball mode with 2 plus any additional locked balls begins. Hit 5 red damage shots to finish the level and move on to the next.
- Phase 1 - Fight White dragon
- Phase 2 - Fight Green dragon
- Phase 3 - Fight Blue dragon
- Phase 4 - Fight Black dragon
- Phase 5 - Fight Red dragon
The table will drain all of the balls in play before starting the next level timer, which may play the ball saved animation.
Completing this mode resets the campaign map and unlocks the Bard as a selectable character in future game starts.
Rescue the King (Barbarian Unlock):
Rescue the King is a wizard mode located in Gauntlgrym that is available after clearing the Town Dungeon mode, The Battle of Gauntlgrym. After finishing the Town Dungeon, the side ramp, center shot, and right ramp are lit blue to start this mode.
This mode is a 7-phase fight that incorporates elements of all of the prior map modes.
- Phase 1 - Stealth Mission - sneak past the guards. If stealth fails (four slingshots) start battle with 16 Zent soldiers.
- Phase 2 - Battle with Raddok’s guards (16 Zent soldiers).
- Phase 3 - Battle with 8 Animated Armor. Upper loop shot will dispel magic and instantly kill one of the monsters.
- Phase 4 - Stealth mission / battle hybrid against a Shield Guardian. Either shoot the white shots to sneak past him or attack him directly.
- Phase 5 - Battle with 4 Helmed Horrors.
- Phase 6 - Battle with 2 Skeleton Minotaurs. Skeleton Minotaurs will respawn if one isn’t killed before the other.
- Phase 7 - Final battle against Balinor. If the player failed Acquire the Lifeblood Armor they will need to destroy the armor first before attacking Balinor directly. Balinor fires firebolts from his gauntlet every few seconds dealing additional damage to the party.
Completing this mode resets the campaign map and unlocks the Barbarian as a selectable character in future game starts.
The Undermountain (Ranger Unlock):
The Undermountain is a wizard mode that can only be accessed by going certain paths in the The Lich of Dragonspear Castle or The Battle of Gauntlgrym town dungeons:
- During the former: select “Stay and fight Sammaster” then defeat him.
- During the latter: select “Help King Raddok” and defeat the Skeleton Minotaurs followed by Balinor.
Once either task is completed, the side ramp, center shot, and right ramp are lit blue to start this mode.
This mode is a 6-phase fight with ball save active for a short time on each level.
- Phase 1 - Find the correct door to access the Yawning Portal by hitting four lit white shots. The same shot cannot be made more than once.
- Phase 2 - Some of your Mezzoloth “friends” arrive. Fend off the Mezzoloths then shoot the dungeon / center spinner to move to the next stage.
- Phase 3 - The player arrives in Skullport, where they are asked for a toll from some Bugbears. If you have 100 gold, you can pay them with the left loop shot. If you don’t have enough gold or don’t want to pay, you can fight them normally.
- Phase 4 - Battle against a Flaming Skull, then shoot the dungeon / center spinner to move to the next phase.
- Phase 5 - A Mezzoloth shows up and tells you to follow him while the Flaming Skulls are attacking in an infinite wave. Shoot four white shots to disengage and escape. The white shots lit are the upper loop, side ramp, and center spinner.
- Phase 6 - Battle against the Mezzloths that have decided to ambush you. After you kill them, search the place by hitting four white shots to recover your health potions and reveal the way forward.
- Phase 7 - The player finds Xanathar’s lair and he’s very upset you made it this far. Each of his eye stalks need to be defeated in order by hitting them normally or using a ranged weapon, and are lit at two or three adjacent shots at a time for 5M a shot. Xanathar attacks on 10 second intervals, and some of the attacks have strange effects: darkening the entire playfield, reversing flippers, or dealing massive damage to one target or your party.
- Phase 8 - Turns out this Xanathar was a fake. Battle him one more time to defeat him and complete the wizard mode.
Completing this mode resets the campaign map and unlocks the Ranger as a selectable character in future game starts.