Quick Links:
- Game Information
- Modes of Play
- Rules Overview
- Layout
- Skill Shots
- Main Objectives
- Other Scoring
- Strategies
Game Information:
- Lead Designer: Brian Eddy
- Code / Rules: Lonnie Ropp, Mike Vinikour
- Artwork:
- Release Date: December 2019
- Current Code Rev.: 1.09
Stranger Things is the first Stern Pinball machine designed by Brian Eddy, after a long hiatus from pinball design. The pin is based on the first two seasons of the popular Netflix sci-fi series.
Modes of Play:
These modes are accessible by holding both flipper buttons during attract mode until a menu appears. The following options are available:
- Standard: See below for full rulesheet.
- Competition: Same as Standard but with elements of randomness removed.
- Challenge: Play any wizard mode as a challenge mode. There is also a Demogorgon challenge mode with a high score for the most successful kills.
- DJ Mixer: NOT a gameplay mode. This mode operates like a Jukebox, allowing you to play the music featured in the machine, including a number of specific playlists.
Rules Overview:
- The six objectives listed on the center of the playfield must be solidly lit to start the final showdown, meaning all missions must be played to access it.
- Make a 5-way combo - preferably early on, as this adds 10M to end-of-ball bonus.
- Make three shots to either ramp or orbit to start a chapter from Season 1 or Season 2. Shoot the flashing shots to win the chapter and collect drawings. Wizard modes are qualified after 4, 8, 10, and 12 chapters. Starting enough chapters lights an extra ball.
- Shoot the DEMODOG targets, then the left standup target, to start a Demodog Attack mode. There are three Demodog Attack modes in total.
- Spell words at the center drop targets, then shoot the scoop behind them to battle the Demogorgon. The five modes all play slightly differently. Use the action button, once per game, to instantly kill a Demogorgon.
- Shoot the LIGHT LOCK targets, followed by the left ramp, to lock balls for 3-ball Telekinesis Multiball. Collect jackpots at the flashing blue shots, then shoot the kicker to cash out the super jackpot.
- Occasionally, the game will switch into Upside Down mode. Shoot the center drop targets to escape. Every other Upside Down requires the major shots to be made.
- Shoot the Burn it Back loop to advance towards extra ball, Spell of Protection ball save & 2x Scoring at the kicker.
- Complete the return lanes, which cycle with the flippers, to advance Bonus X and light mystery at the left standup target.
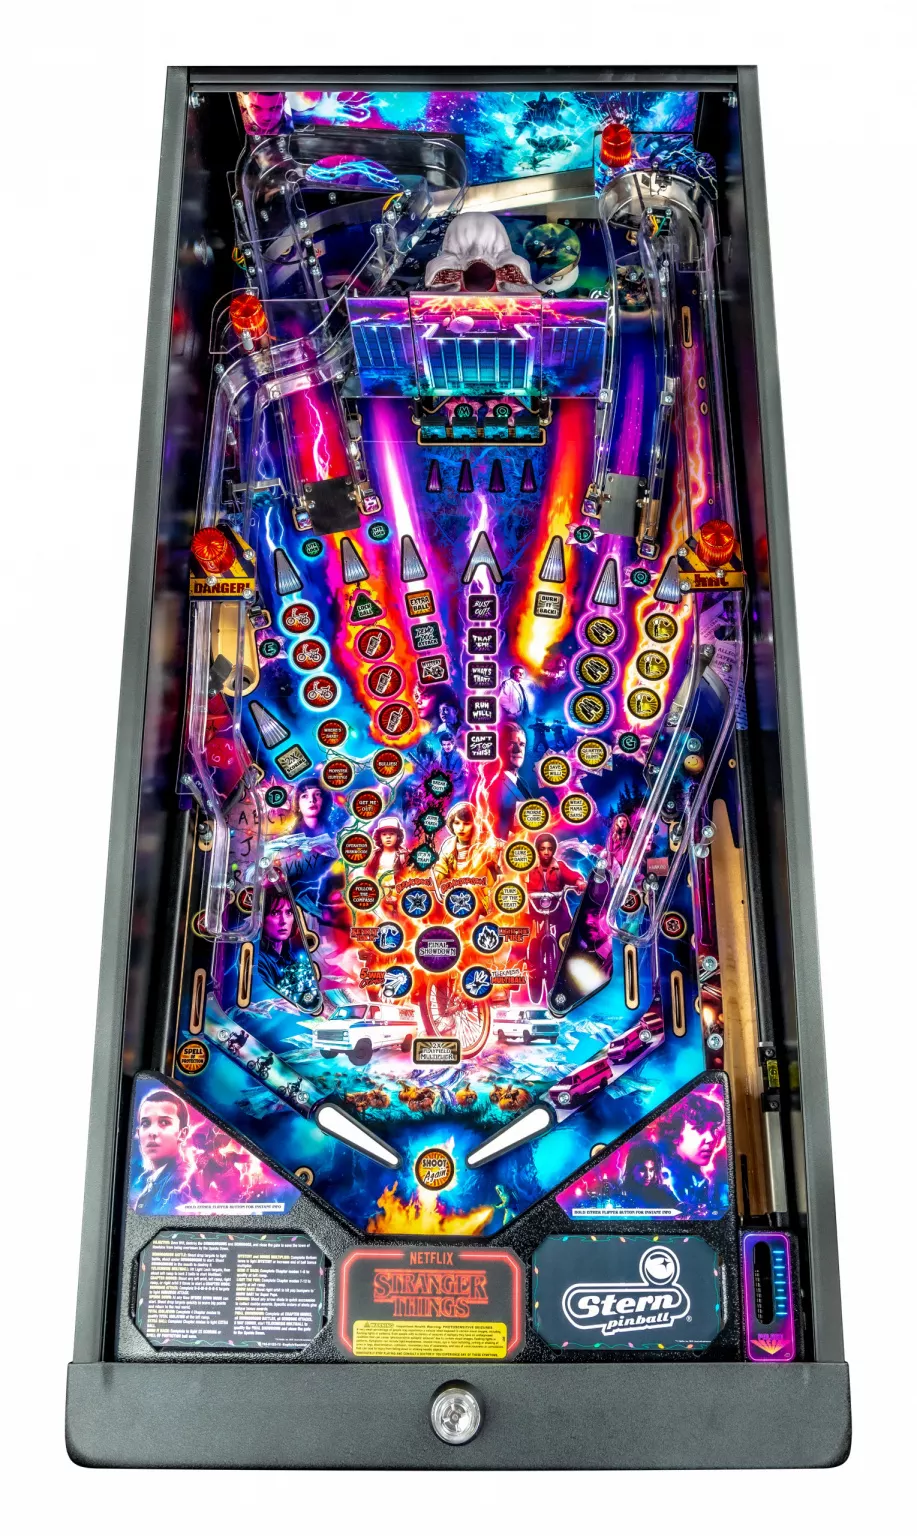
Layout:
Premium/LE: |
Pro: |
|---|---|
 |
Skill Shots:
There are three skill shots that can be scored once the ball enters the plunger lane:
- Skill Shot - Plunge for flashing drop target. Awards 5M + 1M per skill shot.
- Super Skill Shot - Soft plunge towards the flippers, then shoot the kicker. Awards 10M + 2.5M per super skill shot.
- MXV Super Skill Shot - Make both skill shots on the same plunge! This requires a rebound off the flashing drop target that bounces into the kicker. Along with points from both normal skill shots, this awards 25M + 5M per MXV Super Skill Shot, along with a drawing.
Main Objectives:
Directly above the flippers, six inserts are listed from left to right: 5-Way Combo, Send it Back, Demodog!, Demogorgon!, Light the Fire, and Telekinesis Multiball. Each insert solidly lights once their corresponding task has been completed. Once all inserts are solidly lit, the player will be able to attempt the Final Showdown.
Each objective will be listed in their own section, though Chapters will be grouped together as both sets are started similarly.
5-Way Combo:
This objective solidly lights after collecting a 5-way combo. To collect it, you must shoot five shots, with each shot being within a few seconds of the last, and as long as they abide by the following:
-
The left orbit, left ramp, burn it back/right inner loop, or right ramp can be shot five times in a row or any combination of those shots **Note: When ball lock is lit, it’s much harder to combo using the left ramp b/c the combo countdown timer between shots appears to keep running while the ball is being held behind the up-post.
-
The saucer, standup/mystery lane, middle (behind drops), and right orbit can only be the last shot in the combo as they will end the combo
-
Can be collected in MB as long as it follows the two points above
Scoring a 5-Way Combo also adds 10 million points to end-of-ball bonus for the rest of the game. Credit for the 5-Way Combo objective can also be collected from the mystery award.
Chapters:
The Send it Back and Light the Fire objectives are solidly lit once both sub-wizard modes have been completed. These are qualified after completing all six chapter missions from both seasons, for a total of 12 chapters total.
-
Start a chapter by completing a set of three inserts underneath the left orbit, left ramp, right ramp, or right orbit. Shooting one of the aforementioned shots will light an insert underneath that shot
-
Until 2 chapter modes have been played, shooting the left standup lane will spot progress towards starting a chapter. It prioritizes spotting shots that are closest to starting a chapter. Note: If a Demodog mode is lit at the standup lane, it takes priority and will start instead vs spotting progress towards a chapter.
-
The left orbit and left ramp will start season 1 chapters, and the right ramp and right orbit will start season 2 chapters.
-
Initial lit chapters are random but each hit to a pop bumper will change the selected chapter with the left pop cycling through season 1 chapters and the right pop cycling through season 2 chapters.
-
Completing a chapter will award 1 or 2 drawings depending on how you complete it (see each chapter’s section for details).
Season 1 Chapters:
Where’s Barb? (40 sec)
- All shots are lit, with the saucer flashing. Complete the mode by shooting the shot that Barb is at (random). Shots start at 1M and increase +250k for every shot that Barb isn’t occupying.
- Finding Barb on the very first shot awards 40M & an extra drawing!
- Shoot the saucer (2M) to reveal where Barb is (one of the lit shots will now be flashing), then shoot the flashing shot to find Barb for 5M
- If you save the Barb shot for last, it will be 10M instead of 5M.
- +2 Drawings: Find Barb on the first shot.
Monster Hunting (45 sec)
- Shoot the drop targets to collect items and set traps.
- Five waves of drop targets with scores starting at 1M per drop and increasing 500k each wave (1M/1.5M/2M/2.5M/3M).
- Once one or more drops are knocked down, the drop bank resets and advances to the next wave (essentially, you get one shot per wave to knock as many drops down for increased scoring).
- After the fifth wave, all drops will lower and the final shot will be lit at the center.
- Final shot value (7-28M) is determined based on how many drops you knocked down on the final (5th) wave. Each drop adds 7M to the final center shot with a max value of 28M if you shot all 4 drops down on the final wave (practically requiring a MB to accomplish since the drops reset as soon as one is hit).
- +2 Drawings: N/A
Bullies (45 sec)
- Left orbit, left ramp, right ramp, right orbit are lit. Shoot all four shots scoring 1.5M, 2M, 2.5M, & 3M. The left standup lane will then be lit for the fifth and final shot of the mode for 7M.
- +2 Drawings: Shooting the four shots preceding the final shot in this order: right ramp, left ramp, right orbit, left orbit.
Get Me Out! (40 sec)
- Left standup lane, drops, center, and burn it back are lit.
- Scoring is a little weird here as it varies depending on if you avoid the drops, shoot drops only, or shoot some combination of drops and lit shots.
- If you don’t shoot any drops, you need to shoot 5 lit shots to light the final shot at the center (scoring is 1M, 1M, 1.5M, 2M, 2.5M, and then 3M for the final center shot).
- Drops will also progress you through the mode and start out at 1M per drop & increase 500k after every 5 drops to a max of 2.5M per drop.
- If shooting drops only (necessary to get the extra drawing & also the highest scoring potential), drops do not reset until you clear the whole bank of four. You’ll need to clear 5 sets of the drop targets for the center to be the only shot lit for a final shot of 3M and complete the mode.
- When shooting a combination of drops and lit shots, each lit shot appears to progress like you have shot 4 drop targets but only scores (1M/1.5M/2M/2.5M) depending on how far along in the mode you are.
- +2 Drawings: Completing the chapter while only shooting the drop targets (5 sets). The center shot behind the drops can only be shot when it’s the final shot.
Operation Mirkwood (70 sec)
- Shoot the left and right ramps to collect items.
- Each ramp shot scores 1M and both ramps will be flashing after. Making another ramp shot while it’s flashing will act as a combo and add +1M to the value. Otherwise, the value resets back to 1M.
- Collect 10 items to finish the mode, with the 10th item scoring 10M or 20M if you’ve shot every shot in a combo.
- +2 Drawings: Making a 5-Way Combo during the chapter using only the ramps.
Follow The Compass (40 sec)
- One shot will be lit solid orange. Shoot it to un-light and light another shot. Shoot four lit shots scoring 1.5M, 2M, 2.5M, 3M and then the fifth and final shot will be lit at the standup/mystery lane for 7M.
- Shooting the spinner will move the lit shot
- +2 Drawings: Complete chapter without using the spinner to move a shot. Note: Starting this mode from the left standup/mystery lane tends to disqualify you from collecting 2 drawings b/c it hits the spinner on the way down.
Season 2 Chapters:
Quarter Hunt (45 sec)
- All switches are worth 50k
- Every 25 switch hits will score a level up (progress bar at bottom of display), worth additional points (1M, 2.5M, 5M, and 10M).
- Both ramps are lit and shooting a ramp will increase the switch value by 25k. Once you shoot a ramp, it will not re-light to raise the switch value until you shoot the other ramp.
- +2 Drawings by advancing through all four levels.
Save Will (40 sec)
- Combo-based chapter. First shoot the right ramp, then left orbit, left ramp, burn it back loop, and then a choice between saucer / left ramp / left standup lane / center shot as the final shot.
- Each shot starts as a hurry up that starts at 2M + 250K per shot (2M/2.25M/2.5M/2.75M/3M).
- Shooting all 5 shots in a combo awards an additional 50M and an extra drawing!
- +2 Drawings by completing the entire mode as a combo
What Mama Says (40 sec)
- Left orbit, left ramp, left standup/mystery lane, Burn it Back loop, right ramp, and right orbit are lit with the left orbit flashing.
- The flashing shot is worth 2x the current shot value and moves from left to right as they are shot.
- Shots start at 1M and increase by 500k per shot (1M/1.5M/2M/2.5M/3M).
- Making 5 shots will complete the chapter.
- +2 Drawings by only shooting flashing shots.
Morse Code (45 sec)
- Both orbits are flashing and both ramps are lit solid
- Complete the message by shooting the right orbit/bumpers, shooting the spinner, or by shooting ramp shots (each ramp spots 3-4 letters).
- Scoring hard to determine but you get about 16M upon completing the mode.
- +2 Drawings by finishing the chapter with only shots to the right orbit. Note: Starting this mode from the left standup/mystery lane tends to disqualify you from collecting 2 drawings b/c it hits the spinner on the way down.
Lure Dart (40 sec)
- Left orbit, Burn it Back loop, and right orbit are lit.
- Scoring starts at 3M and increases +250k per shot (3M/3.25M/3.5M) with the fourth and final shot lit at the left standup/mystery lane for 3.75M after shooting the first three shots.
- Depending on Dart’s current level (increased with the bumpers), the scoring from this mode will either start at 3M/4M/5M. (Each shot will still only increase by 250k)
- +2 Drawings by shooting the lit shots preceding the left standup lane in the following order: Burn it Back, right orbit, left orbit.
Turn Up the Heat (40 sec)
- Left standup/mystery lane, Burn it Back loop, both ramps and the standups for each ramp are lit.
- The two inner flashing shots score 2M and raise the temperature the most.
- Ramps score 1M and raise temp less than the flashing shots (about half as much).
- Each ramp’s standups score 500k and raise the temp the least (about half as much as the ramps).
- Complete the mode at the left standup/mystery lane once the temperature reaches a certain point (4 flashing shots/7 ramps/14 standups/some combination of the three)
- +2 Drawings by completing the chapter with only shots to the left standup/mystery lane or Burn it Back loop (flashing shots).
Total Isolation:
Once each shot’s three inserts have been collected, the next shot to the left ramp will begin a Total Isolation multiball mode. Total Isolation 1 is qualified after playing 4 chapters, and Total Isolation 2 is qualified after playing 8 chapters. Normal add-a-ball rules apply to both multiball modes.
- Total Isolation 1: Multiball similar to Total Annihilation from Attack from Mars, where all the major shots are lit to score Jackpots (albeit they can’t be shot over and over) and the center scoop will score a Super Jackpot worth the total of all the previously collected Jackpots after enough Jackpots have been collected. Jackpots start at 1M increasing by 100K per shot; if jackpots are shot as a combo, they are doubled. 3 Jackpots are required to qualify the first Super Jackpot, increasing by 1 Jackpot each time; and the third Super Jackpot will add a ball. Once all shots are required to collect the Super Jackpot, it reverts back to 6 shots for a Super Jackpot, and only 5-6 shots will be lit instead of all of them.
- Total Isolation 2: Every major shot flashes for points. Hit a shot and it turns solid; then, shoot it again for a double jackpot. Making combos during this multiball also doubles the jackpot values. Do this for all lit shots to light the Super Jackpot at the center, for the combined value of all shots made.
Send it Back:
After all 6 Season 1 chapters have been played, the next shot to the left ramp will start Send it Back and solidly light its corresponding insert. Starting Send it Back awards a jackpot of 10M per drawing collected.
Alternate shots between the major flashing shots and the center shots (DEMODOG targets, or the center scoop). Repeat this process once per major shot. The Demogorgon will be qualified after all major shots have been made; use the center ramp to bash the Demogorgon (or mouth shot for an instant kill) for a super jackpot worth the total points from the wizard mode. Normal play then resumes.
Light the Fire:
After all 6 Season 2 chapters have been played, the next shot to the left ramp will start Light the Fire and solidly light its corresponding insert. Starting Light the Fire awards a jackpot of 10M per drawing collected.
Shoot the center shots (DEMODOG targets, or the center scoop) over and over. Each shot lights one of the DEMODOG targets. Once all targets are lit, the center becomes unlit. Then you need to complete all the DEMODOG targets. The super jackpot, worth the total points from the wizard mode, can be collected at either the left standup lane or the kicker after completing the DEMODOG targets; the kicker scores double the super jackpot value. Normal play then resumes.
Demodog Attack:
Spelling DEMODOG with direct shots to the standup targets (or the saucer for the first Demodog Attack mode) will light the left standup lane to start Demodog Attack. All three Demodog modes must be played to solidly light the Demodog! objective’s insert. Completing a Demodog Attack mode also awards a drawing.
Chapters can’t be started while Demodog Attack modes are running, but if they were started before the Demodog Attack mode, they will continue running. Demogorgon Modes and Telekinesis Multiball can also be progressed towards and started during these modes.
Break Out!: (40 sec)
- All DEMODOG targets are lit to kill a Demodog and score 1M
- Hit 15 targets to complete the mode and award a drawing
- Value increases, when you complete all pulsing DEMODOG targets - 2M for the second wave, and 4M for the third wave.
Junk Yard: (40 sec)
- Three phases with 2 shots lit per phase (orbits, ramps, inner lane/loop)
- Phase 1: Both orbits lit. Shoot the same orbit twice for 1M each or shoot both with the 2nd scoring 2M plus increased scoring for the rest of the mode
- Phase 2: Both ramps lit. Shoot the same ramp twice for 2M/3M or shoot both with the 2nd scoring 4M/6M plus increased scoring for the rest of the mode
- Phase 3: Left standup lane & Burn it Back are lit. Shoot either shot twice for 4M-9M or shoot both with the 2nd shot scoring 8M-18M
- +1 Drawing awarded for completing phase 3
It’s a Trap!: (40 sec)
- All eight shots lit, score 3M each and unlight upon being shot
- +1 Drawing awarded for shooting all eight shots
- Demodog! objective insert will light solid upon starting
Demogorgon Modes:
Complete the drop targets to spell words and light Demogorgon Ready - each mode requires one more completion of the drop targets than the last. Once the drop targets are lowered and the purple arrow is strobing, shoot up the middle to start a Demogorgon Mode. Some are single ball and some are multiballs.
(Note - if you can sneak the ball behind the drops before all of them are down and register the center shot, all remaining drops will be spotted and the current word will be awarded). All five Demogorgon Modes must be played in order to solidly light the Demogorgon! objective.
During Demogorgon Modes, the action button flashes red, and pressing the button will use up the Demogorgon Bomb. Only one Demogorgon Bomb is given per game, and using it will kill the currently active Demogorgon for a reduced value. This also locks in the jackpot value during the two multiball Demogorgon Modes, and does not reduce the Super Jackpot value during those modes.
- Bust Out!: Single-ball mode. A single shot up the middle into the Demogorgon will kill it for 15M, or 10M if you hit the sides at least once before shooting into its mouth. Alternatively, five hits to the side (100K each) will kill it for 5M. Minimal value. Don’t waste your Demogorgon Bomb here.
- Trap ‘Em!: 2-ball multiball. The Demogorgon is lit to score a hurry-up starting at 5 million and lowering to 500k. A successful shot into the center, or five shots to either side of the Demogorgon, will collect the hurry-up, lock it in, and light all the major shots for Jackpots worth that value. Collecting all the Jackpots will begin a Super Jackpot hurry-up at the Demogorgon, worth the total of all the jackpots combined; it can then be shot again for a second Super Jackpot worth the same value. The Jackpot value then increases, and the sequence resets.
- What’s That?: Single-ball mode. You have to kill 3 Demogorgons. Each are worth 30M for shots into the mouth on the first try, 20M after any bashes, and 10M if bashed to death.
- Run Will!: 4-ball multiball. Phase one, shot the Demogorgon during the hurry-up to lock in the jackpot value. Phase two, all the drops are lit for jackpots. Collect those to light the Demogorgon for a Super Jackpot hurry-up worth the total collected jackpot values; however, the ramp leading up to the Demogorgon will lower and raise every second or two. Collect the Super Jackpot to start the jackpot phase again and work towards another Super Jackpot hurry-up.
- Can’t Stop This!: 5-ball multiball. Unlimited ball save for 60 seconds. Shoot red jackpots lit across the playfield - once all shots have been made once, the ramp will lower for a Super Jackpot at the Demogorgon mouth worth the total combined jackpot values, maxing out at 100M; then the jackpots will relight for another attempt at the Super Jackpot. Try to collect as many Super Jackpots before the timer runs out!
Telekinesis Multiball:
Light locks by shooting the green standup targets on each side of the left ramp. For the first multiball, completing both targets once lights all three locks. For the second and third, completing both targets lights one lock. For the fourth and thereafter, two sets of targets light each lock. Shoot the left ramp to lock balls. 3rd lock starts the multiball. Chapters can be started before activating Telekinesis Multiball, but not during it.
(On the Prem / LE, if another multiball is started while balls have already been locked for Telekinesis Multiball, pressing the action button will swipe a ball, adding a ball to the active multiball. However, swiping a ball will require another shot to the left ramp to lock a ball after multiball ends. There is no limit to how many times this feature can be used.)
During Telekinesis Multiball, shoot 5 lit jackpots to light Super Jackpot at the left saucer for 6M; collect the Super Jackpot to solidly light the Telekinesis Multiball insert and collect a drawing. The left ramp will also be lit to lock a ball for 20 seconds to double the Super Jackpot value (Pro); or up to two balls can be locked on the magnet for 2x / 3x Super Jackpot (Prem / LE). Regular jackpot values start at 1.1 million and go up by 100k per Super Jackpot. All values can be doubled again through 2x Scoring.
Final Showdown:
Once all six objectives have been solidly lit, the next shot to the left ramp will start the Final Showdown. Starting Final Showdown awards a jackpot of 10M per drawing collected. (no spoilers here, though there is a surprise at the end of the game if you complete this mode.)
Other Scoring:
The Upside Down:
At random times (based on switch hits), the game might go into an alternative mode. Although progress towards starting Chapters and Telekinesis Multiball isn’t visible during this mode, they can both be started during Upside Down 1 (but not during Upside Down 2). Upside Down can also start during a chapter.
- Upside Down 1: Each drop target scores a hurry-up value starting at 7.5M, which doesn’t reset with each shot. Max value if all drops are hit quickly is 30 million.
- Upside Down 2: The ramps and orbits are lit for a hurry up of 10 million; each shot adds a multiplier to the value, to a max of 4x for the final shot. Carefully combo all these shots for big scoring, especially with 2x Scoring. Max value is around 80 to 90 million.
Burn it Back:
Shots to the Burn it Back loop count up over the course of a game and award certain features after enough shots have been made:
- Extra Ball after 1-10 Burn it Back loops and then once again at 50 loops
- Spell of Protection at 3, 12, 25 and then every 14 loops after (39, 53, etc.)
- 2x Scoring at 7, 18 and then every 14 loops after (32, 46, etc.)
Note: Spell of Protection and 2x Scoring alternate as awards after 3, 4, 5, 6 and then every 7 loops.
Spell of Protection:
Spell of Protection is lit at the left outlane after a certain amount of Burn it Back loops, or from a mystery award. When lit, the ball will be saved from a drain down the left outlane.
Lighting Spell of Protection if it has already been lit will increase its value by 250K.
2x Scoring:
2x Scoring is lit at the saucer after a certain amount of Burn it Back loops. Shoot the saucer when lit to start 60 seconds of double scoring.
Dart (Pop Bumpers):
Enough pop bumper hits will increase their value, evolve Dart and eventually award a drawing. The level Dart is at will affect the scoring on the Season 2 chapter, Lure Dart. Pops start at 10k per hit and increase by 3k after every level. It takes 25 pops to reach the first level and then it takes same amount +5 more to reach the next. The first few levels and their awards are as follows:
- 25 pops - evolve Dart (13k per pop)
- 55 pops (+30) - 2nd evolution & increased Lure Dart scoring (16k per pop)
- 90 pops (+35) - 3rd evolution & final increase in Lure Dart scoring (19k per pop)
- 130 pops (+40) - +1 drawing (22k per pop)
Note: Future pop advances appear to only increase the value of the pops.
Drawings:
Completing certain objectives will collect drawings. Certain objectives will collect 2 drawings at once when achieved. Each drawing adds 10M to the jackpot collected at the start of all three wizard modes, and adds 2M to end-of-ball bonus. Collecting 11 drawings in a single game will light an extra ball.
Drawings can be collected by:
- Scoring an MXV Super Skill Shot (+1 Drawing)
- Completing a Chapter (+1 Drawing)
- Completing a Chapter under a certain restriction unique to each chapter (+2 Drawings)
- Completing a Demodog Attack mode (+1 Drawing)
- Collecting a Super Jackpot during Telekinesis Multiball (+1 Drawing, +2 for a 2x Super Jackpot, +3 for a 3x Super Jackpot on Prem / LE)
- 4th increase in pop bumpers - 130 bumper hits (+1 Drawing)
- Random mystery award (+1 Drawing)
Mystery Award:
Odd-numbered completions of the return lanes, which can be cycled with the flippers, light the mystery award at the left standup lane. During timed modes, including 2x Scoring, every other mystery award will add time to the mode; and if ball save isn’t active, the first mystery award qualified during any multiball mode will add a ball.
Mystery is pseudo-random and will generally help the player out, but is deterministic in tournament mode.
The mystery animation shows a 20-sided dice roll, with each side corresponding to a different award:
- Light Lock (for Telekinesis Multiball)
- Light Extra Ball (15M if EBs are disabled)
- 5-Way Combo (credit for objective + a cool animation)
- Add-A-Ball
- Advance Spinner Value +3k
- Start Chapter
- Light Burn it Back (for the next award, either Spell of Protection or 2x Scoring)
- Stranger Points (11M)
- Hold Bonus (Hold Bonus X, will award bonus with multipliers twice if collected on the last ball)
- +1x Bonus Multiplier
- Eleven (never awarded)
- Upside Down
- Multiball
- Add Time
- Advance Dart (+3k bumpers)
- Light Demogorgon Ready
- Bulls@!t (apparently it’s just that, all switches score BS and some points)
- Light Demodog Attack
- +1 Drawing
- Spell of Protection
Extra Balls:
Extra Ball can be lit at the left standup lane by:
- Starting 3 Chapters
- Starting 6 Chapters
- Scoring between 2 to 10 Burn it Back loops (percentage-based)
- Scoring 50 Burn it Back loops
- Rolling 2 on the Mystery Award (percentage-based)
End-of-Ball Bonus:
Bonus automatically carries over between balls (outside of chapter scoring), and is determined by totaling:
- 10 million if a 5-Way Combo is achieved
- Demogorgon Modes started x 2M
- Demodog Attacks started x 5M
- Telekinesis Multiballs started x 3M
- 10% of all points scored during Chapters this ball
- Drawings collected x 2M
- Multiplied by Bonus X (increases by +1x with even-numbered return lane completions, maxes at 5x)
Bonus Hold can be awarded from the Mystery Award, which will hold the bonus multipliers to the next ball. If Bonus Hold is awarded on the last ball, the bonus will be awarded twice with multipliers.
Strategies:
Stacking strategies:
- General modern pinball strat of stacking Telekinesis Multiball onto a running mode applies. Chapter modes must be started either prior to MB, or with the same shot to start MB. An even better stack is to bring Demodog mode to the party, in which case you must use the following sequence: Start Chapter mode → Start Demodog → Start Telekinesis MB.
- I wouldn’t recommend stacking Telekinesis onto a non-MB Demogorgan mode, unless you know you’re able to consistently kill the Demogorgan with a mouth shot. Otherwise, the big ramp flap gets in the way of your Mystery (Add-a-ball) and the Burn It Back shot.
- Some Chapter modes are better for stacking a MB onto than others. Figure out which ones work best for you, depending on your play style.
Bonus can be HUGE. If you’ve done a decent amount of achievements that impact EOB Bonus, consider spamming your favorite ramp shot(s) to get inlane completions toward maxing out your BonusX.
Don’t ignore/neglect your Burn It Backs! Getting the Spell of Protection is like an Extra Ball, and well-time 2x Scoring can be massive with a good stack or well-played high-value mode.
Premium: Use the Swipe-a-Ball


