Quick Links:
- Game Information
- Rules Overview
- Layout
- Skill Shots
- City Objectives
- Main Multiballs
- Other Scoring
- Extra Balls
- Bonus
- Mini-Wizard Modes
- King of the Monsters (Final Wizard Mode)
- Monster Island Madness (Ultra Wizard Mode)
Game Information:
- Lead Designer: Keith Elwin
- Code/Rules: Rick Naegele, Keith Elwin
- Lead Mechanical Engineer: Harrison Drake
- Artwork: Zombie Yeti
- Computer Graphics Art Director: Chuck Ernst
- Lead Sound Designer: Jerry Thompson
- Release Date: September 2021
- Wiki Rulesheet based on Code Rev: 1.08
- Edit the Code revision, if applicable, when you make changes
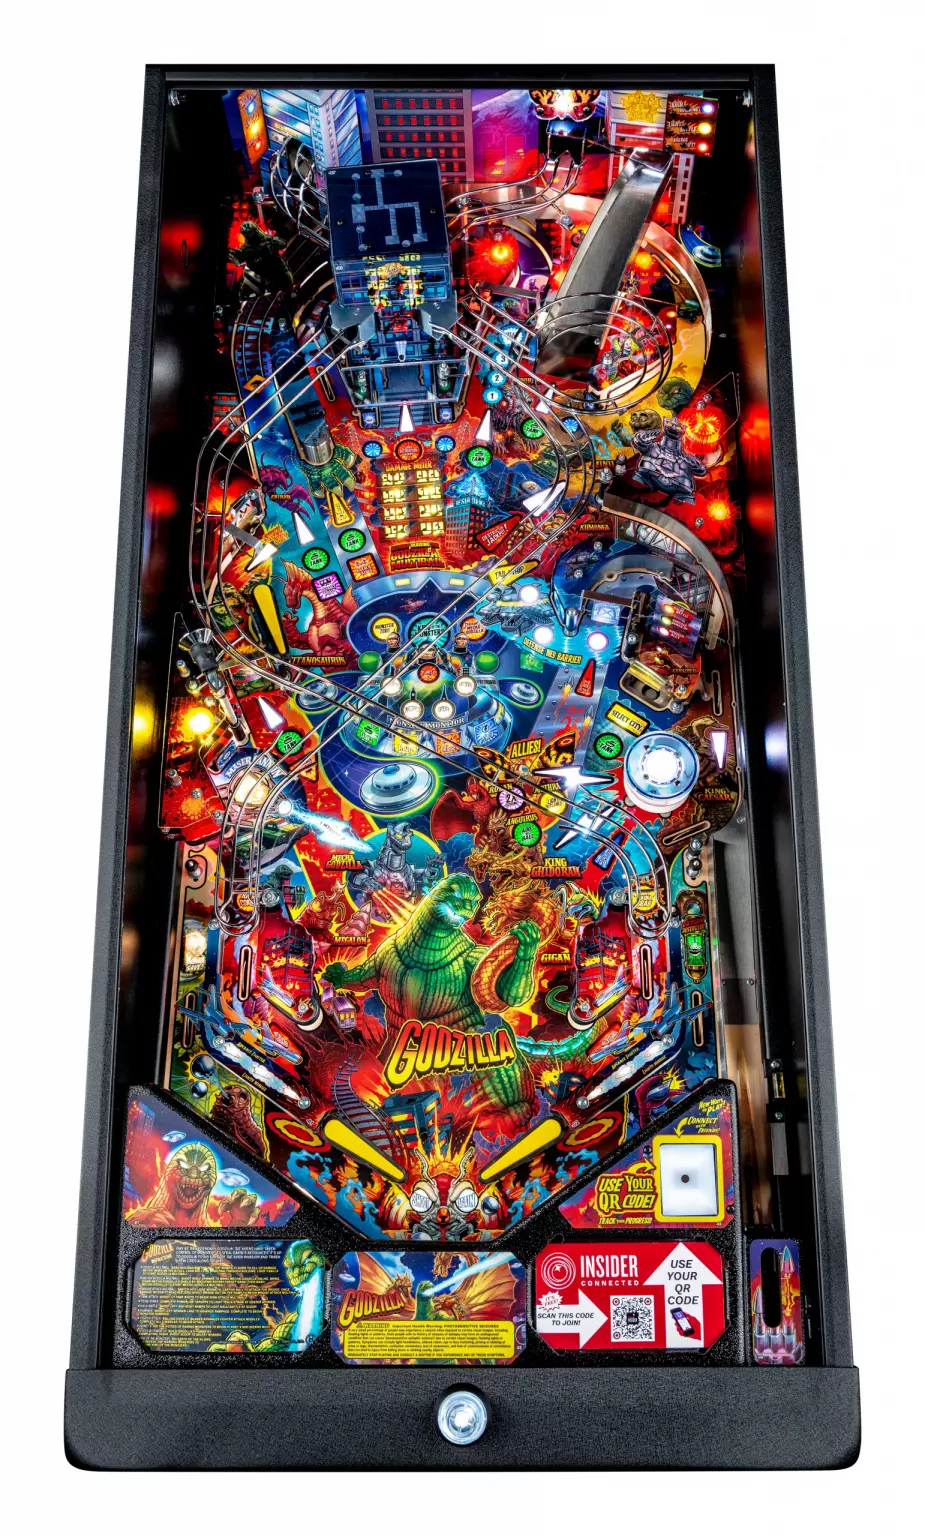
Godzilla is the fourth Stern pinball machine designed by Keith Elwin and the first machine to implement Stern Insider Connected, released in September 2021. The table depicts events from 10 classic Godzilla films in an original story depicting Godzilla fighting against the Xilien invasion of Earth, while tearing up a few cities for good measure.
Rules Overview:
- The goal of Godzilla is to defeat the Xiliens on Planet X by starting (not necessarily completing) every objective in a city. Each city has a Kaiju that must be defeated in order to conquer it.
- Shoot either ramp twice to light Kaiju Battle at the scoop. Subsequent battles require a shot to both ramps.
- Use the flippers to select which monster you want to battle and follow the flashing arrows.
- Winning battles allows you to switch cities at the scoop, to win more battles and attempt tier 2 battles, or progress to Planet X right away as soon as you’ve played all four objectives.
- Other tasks like destroying the powerlines, tanks, and bridges award bonus modes and points. These also light the Destruction Jackpot at the building and are also required for Planet X.
- Shoot the ramps and the building itself to destroy the building and light Godzilla Multiball.
- Use the window inserts in front of the building to determine the number of hits remaining. Start Godzilla Multiball by shooting the building again.
- During Godzilla Multiball, make lit shots for progressive jackpots. Score 6 jackpots to light the super jackpot at the building.
- Shoot the right spinner to progress towards Mechagodzilla Multiball.
- Once Mechagodzilla has been activated, shoot the three blue flashing targets, then shoot the right spinner again to start Mechagodzilla Multiball.
- Jackpots alternate between the ramps / building and the three blue flashing targets. Once all six jackpots have been scored, spinners build up the super jackpot for 15 seconds. Collect it at the right spinner or tail whip lane.
- Allies are lit after achieving certain tasks in gameplay. Rodan awards 2x scoring for a minute, Mothra lights the left outlane ball save, and Anguirus qualifies an add-a-ball. Change the qualified ally using the right flipper.
- Completing tasks throughout the game also advances the Godzilla Powerup meter. Shoot the scoop when lit with the green light above it to score a Powerup of your choice. Wizard modes await players who score either super jackpot and reach Powerup levels 4 and 8.
- Extra balls are instantly awarded after conquering 2 cities, destroying 3 saucers at the pop bumper, or destroying 10 jets during Jet Fighter Attack (started with inlane hits).
Layout:
Premium/LE: |
Pro: |
|---|---|
 |
Skill Shots:
The plunger on this game is player-controlled. Plunging at full strength will usually result in the ball hitting the Magna-Grab captive ball.
Regular Skill Shots:
- #1: Short plunge to the switch directly under the bumper. Scores 250K x number of unique skill shots, and 3 seconds of ball save time. Boosts future skill shots #1 and #2 by 250K.
- #2: Short plunge to the first switch out of the shooter lane. Scores 500K x number of unique skill shots, and 5 seconds of ball save time. Boosts future skill shots #1 and #2 by 250K.
- Short plunge directly to the bumper - or shoot it after failing to register any other switch. Scores 750K x number of unique skill shots, and 5 seconds of ball save time.
- Plunge the ball into the left spinner lane, behind the upper flipper. Scores 5M + 1M x the number of unique skill shots made, and 8 seconds of ball save time.
(Super) Secret Skill Shots:
- Plunge to the upper flipper and make a reflex shot to the upper loop. Scores 4M x the number of unique skill shots made, and 5 seconds of ball save time. Boosts future secret skill shots by 2M.
- Plunge the ball into the left inlane. Scores 5 million + 1 million x the number of unique skill shots made, and 5 seconds of ball save time. Boosts future secret skill shots by 2M.
- Super Secret: Make the left spinner lane skill shot described above, and immediately make a reflex shot to the scoop. Scores 10M, +2 Godzilla Power-Ups, and lights + collects an Ally. Does not add additional ball save time, but boosts future secret skill shots by 2M.
City Objectives:
The Xiliens plan to wipe out the populations of four major cities by summoning mind-controlled monsters once thought to have been defeated. Godzilla must emerge from the depths once more to take down the opposing forces while destroying the cities.
Each city has four major objectives: Kaiju Battles (RAID), Tesla Strike (POWER), Bridge Attack Multiball (BRIDGE), and Tank Attack Multiball (TANKS). These objectives can only be accomplished once per city; completing any of them - or just attempting a Kaiju Battle - will light the Destruction Jackpot at the building and allow the player to change cities by shooting the scoop.
The player doesn’t need to complete each feature in a city to move on, though they will miss out on perks for having conquered cities; and once the latter three objectives have been played out, the player can repeatedly shoot the shots that started them for Annihilation Bonus points. These act as “victory laps” of sorts, and add up into Carnage Bonus, awarded after changing cities.
Play all four of the listed objectives in a single game, across multiple different cities, to light the scoop for Planet X Multiball.
The four Monster Monitor inserts are:
RAID - Kaiju Battles:
Summon the Xiliens and listen to their plan for world domination by shooting either ramp twice, then shoot the scoop and select a 60-second timed Kaiju Battle using the flippers and action button (subsequent Battles require one shot to both ramps to light). The first battle during a game is restricted to the Tier 1 column; Tier 2 battles can only be played by changing cities and completing at least half of a Tier 1 battle in that new city. Making it halfway through a battle also lights Ally at the scoop, and fully completing the battle conquers the city for bonus perks & increases the Destruction Jackpot Multiplier.
Subsequently, battles have to be lit by shooting both ramps instead of just one ramp twice.
Progress is saved between battle attempts, but the shot value resets, and the timer bonus for the final shot (500k x seconds remaining, or 2.5M x seconds remaining if chosen via Godzilla Power-Up #2) is reduced to 1/10 of its normal value if the player didn’t win on their first try.
Jet Fighter Attack, Tesla Strike, and any Multiball modes can be activated during and stacked with Tier 1 battles - but Tier 2 battles take priority over all other scoring features. A Kaiju Battle cannot be started if a multiball is already running or if Tank Attack Multiball is lit at the scoop.
Tier 1:
Ebirah
Collect 15 spins from the left and right spinners each, and 40 spins from the center spinner. Each completed spinner scores 5M + 5M per spinner. After completing all three spinners, shoot the pop bumper for the final blow, worth 25M.
Titanosaurus
Shoot five flashing targets - the three powerline targets from left to right, then the Maser Cannon, and lastly, the Magna-Grab captive ball. The first target scores 4M, then 7M, 10M, 15M, and final shot is 20M. Each shot to the Mechagodzilla targets during this battle scores 1M and adds 500K to the next shot.
Gigan
Make eight left or right ramp shots in any combination. Ramp shots award 1M + 500k per shot, and shooting the opposite ramp as a combo scores double (note that looping one ramp does not count as a combo). The final blow, if made as a combo, scores 4x the value (or 2x if it wasn’t made as a combo).
Megalon
A random flashing purple shot will light for about 10 seconds. Hitting the flashing shot before it times out will award 4M + (points per switch hit) + 1x per lit shot, to a max of 5x, and light a new, different flashing shot; 7 shots must be made this way to win the battle. Failing to hit the flashing shot before time expires will allow Megalon to hide; while in hiding, shooting either ramp will return Megalon to fighting mode and light a combo shot to attack him. Timing out Megalon while he is hiding underground will result in him spawning at a random shot. Final blow scores the value of a normal shot + 10M.
Tier 2:
Godzilla, Rodan & Anguirus VS King Ghidorah
75 seconds. Take down King Ghidorah by shooting the flashing shots - the left ramp, building, center spinner, right ramp, and big loop - three times each. Shots start at 400k and increase by 150k per shot. All shots start green and award 1x, then yellow for 2x, and finally red for 4x. Collecting a red shot qualifies the scoop for Fight or Flee if it isn’t lit, and adds a multiplier to the jackpot value that can be collected for fleeing at the scoop - which starts at 16M.
During Fight or Flee, pressing the left flipper for “Fight” adds 35 seconds (less time on subsequent selections of Fight), resets the shot colors (but not the shot value), and allows you to continue increasing the value for winning the battle and its multiplier; while pressing the right flipper for “Flee” allows you to collect the multiplied value + 200k x seconds remaining and end the battle. The mode ends if the player drains while the mode is running, the timer runs out, or if they select Flee.
Godzilla & Jet Jaguar VS Megalon & Gigan
3-ball multiball mode, albeit lower scoring than the massive jackpots that can be collected in the other Tier 2 battles. Two shots are lit for 30 seconds each to collect jackpots starting at 3M and increasing by 500K per Super Jackpot:
- Building & right spinner
- Left ramp & right ramp
- Left ramp & upper loop for the remainder of the mode
After each jackpot, shoot the right spinner for a Super Jackpot worth the jackpot value + a multiplier that increases by 1x per Super Jackpot to a max of 4x - until one of the jackpots times out and the multiplier resets. Each Super Jackpot also advances +1 arrow towards Godzilla Power-Up.
Godzilla & Anguirus VS King Ghidorah & Gigan
75 seconds. Score 40 switch hits to light the major shots for 7.5M each, then shoot them again to increase the jackpot multiplier for each shot. Shoot the building at any time while the mode is running to activate Fight or Flee. Each switch hit adds 35K to the jackpot, and each lit shot adds 350K to the jackpot, which starts at 1M. The five shots can only be relit after being collected by choosing “Fight”, and will require another 40 switch hits to light.
During Fight or Flee, pressing the left flipper for “Fight” adds 35 seconds (less time on subsequent selections of Fight) and allows you to continue increasing the value for winning the battle and its multiplier; while pressing the right flipper for “Flee” allows you to collect the multiplied value + 200K x seconds remaining and end the battle. The mode also ends if the player drains while the mode is running or the timer runs out.
POWER - Tesla Strike:
To activate Tesla Strike, all 3 Powerline targets must be completed twice (+1 per activation). This will start Powerline Attack and cause a single Powerline target insert to rove between targets. Shoot the flashing target 5 times +2 per activation for 500,000 points each, with the final shot starting Tesla Strike.
Tesla Strike is an untimed mode that revolves around shooting the center spinner to light the major shots. Shoot the center spinner to increase the Tesla Value, which starts at 2M (+2M per Tesla Strike started), by 100K points per spin. Then, shoot any of the blue flashing shots to collect the Tesla Value. The amount the spinner builds the Tesla Value also increases by 100k per spin after each Tesla Value collect; however, only one rip of the center spinner is allowed before you must collect a unique blue shot to relight it. Repeat this process 5 times, making 5 unique shots, to win the mode.
After Tesla Strike ends, Power Annihilation Bonus lights for a base of 2% of the points scored during the mode. This can be collected at the strobing Powerline target, which moves from left to right with each collect.
BRIDGE - Bridge Attack Multiball:
Score 50 switch hits (+25 per activation) to light Bridge Attack at the Magna-Grab captive ball. Scoring Bridge Attack removes -25% bridge integrity, so repeat this process four times to destroy the bridge, then shoot either ramp when Bridge Out! is flashing to start a 2-ball Bridge Attack Multiball. This is dependent on the building’s position on Prem / LE, but will always be the right ramp on Pro.
During Multiball, all shots are lit to score jackpots worth 1M + 250K per right ramp shot (+1M for each time the MB is started) each; scoring 3 jackpots lights the Magna-Grab captive ball to score double jackpots. After 2 double jackpots have been scored, a 15 second timed super jackpot round begins where each right ramp shot scores a super jackpot worth 6x the base jackpot value, and the first two super jackpots adds a ball. This process repeats for the rest of the multiball, and the jackpots increase by 750K per super jackpot collected. Jackpot value maxes out at 4M + 1M x Bridge Attack Multiball started.
Playing Bridge Attack Multiball will light Bridge Annihilation Bonus for a base of 4% of the points scored during the multiball. This lights at the Magna-Grab captive ball after enough switches have been hit.
TANKS - Tank Attack Multiball:
Shoot the lit TANK shots to destroy tanks; two will be lit at a time, at random shots on the playfield. Defeat 10 tanks (+5 per activation) to light Tank Attack Multiball at the scoop. If qualified, this multiball overrides the Kaiju Battle selection screen, though you can start it during a currently active Kaiju Battle.
The goal of Tank Attack Multiball is to shoot the flashing, roving TANK shots for jackpots before they attack Godzilla at the captive ball. Each tank destroyed scores 2.5M + 1M per super jackpot collected - 500K per shot the tank moves towards, and increases the super jackpot multiplier +1x to a max of 3x. Tanks spawn at the left spinner and scoop, with one being lit at the right ramp at the start of multiball.
The tanks slowly approach the captive ball in 8 second intervals - 2 seconds per super jackpot collected to a minimum of 2 seconds; if this shot times out without scoring a jackpot, then a tank will reach Godzilla, and the super jackpot multiplier will decrease by -1x. Destroy 4 + (1 to a max of 8 per super jackpot collected) tanks to light Super Jackpot at the Maser Cannon stand up target, worth 50% of the sum total of collected jackpots x the jackpot multiplier.
Playing Tank Attack Multiball will light Tank Annihilation Bonus for a base of 2% of the points scored during the multiball. This can be collected at the random flashing tank shot.
Destruction Jackpot:
Destruction Jackpot can be lit at the building by:
- Starting any of the four city objectives (w/ +1x Multiplier for completed Kaiju Battles)
- Defeating 12, 20, 30, 40 etc. Saucers (w/ +1x Multiplier)
- Completing the Rage Combo sequence (w/ +1x Multiplier)
- 25, 40, 80, 120 etc. total Loops (w/ +1x Multiplier)
- 7, 20, 33, 46, etc. Tail Whips
- Collecting 10 Trains (w/ +1x Multiplier)
- Mystery Award
Shoot the building during single-ball play when Destruction Jackpot is lit, and the Magna-Grab post will hold the ball, then drop it to the upper flipper after about 9 seconds. Shoot the upper loop to collect the Destruction Jackpot. A brief grace period is given to collect the Destruction Jackpot if you miss the initial loop shot, which can be increased as an option from Godzilla Powerup #3. Each collected Destruction Jackpot also boosts the value of all Annihilation Bonuses by +1% and lights the left spinner to advance towards Monster Rampage.
The total Destruction Jackpot value = 5M (+1M per Monster Monitor insert) + Temporary Base Value x Multiplier. The temporary base value is removed when the player changes cities. An additional +4M is added to the Destruction Jackpot if London has been conquered, and an additional +15M is added for conquering all four Cities in a single game.
-
Temporary Base Value =
- 5% from city objectives
- 5% from Jet Fighter Attack
- 1% from Monster Rampage
- 3% from Godzilla Multiball
- 3% from Mechagodzilla Multiball
-
Multiplier: Starts at 1x & increases by +1x from the methods described above, as well as:
- Destroy 15 Fighters during Jet Fighter Attack
- Imposter Battle #3
- Make 24, 36, 48 etc. cumulative shots during Monster Rampage (+2x!)
- Godzilla Power-Up #9 (+2x!)
- Mystery Award
Annihilation Bonus & Carnage Bonus:
When you complete the following in a City, an Annihilation Bonus will be lit until you leave the City, based on a percentage (by default, 2% Powerlines, 4% Bridge, 2% Tanks) of each respective mode’s point total:
- Tesla Strike, a single pulsing Powerline Target
- Bridge Attack Multiball, hitting switches will pulse the Attack Bridge insert
- Tank Attack Multiball, a single pulsing Tank Shot
Annihilation Bonuses are boosted by +1% for every Destruction Jackpot collected, are boosted by +1% for conquering Tokyo, and are also boosted by 1% as the 2nd Imposter Battle award. Each Annihilation Bonus is added into the Carnage Bonus value, and has a base value of 1M. If multiple Annihilation Bonuses are lit at once, their scoring will be given a +1x multiplier, up to 3x for having all three lit on the same ball.
Once the player leaves a City, they will score the Carnage Bonus. This is determined by adding up:
- The current Destruction Jackpot, excluding the multiplier but including temporary base value
- Total points from all three types of Annihilation Bonus
- +1x per Annihilation Bonus activated on the same ball (ie. if all three were collected before cashing out the Carnage Bonus, this would be 4x)
- +1x if all four city objectives were played
City Select:
After playing a Kaiju Battle, the right scoop will light for City Select and allow you to change your current City and collect the Carnage Bonus, or stay in the current one. If you choose to stay, you must play one of the other three city objectives to relight City Select. The game always begins in Tokyo; New York, London, and Paris are also available. Changing Cities also lights the left spinner to advance towards starting Monster Rampage.
The purpose of City Select is to determine whether you want to continue playing for a potentially larger Carnage Bonus by playing out the current city, or if you want to complete cities quickly to get to Planet X. Kaiju Battles are locked to the City they have been selected in, and changing cities before completing their respective battle will permanently forfeit the city. The four city objectives can only be played once per city, and the city must be changed to re-qualify them.
Cities can be conquered by winning their respective Kaiju Battles, and each city awards a perk, +1 Bonus X, and +1x Super Spinner immediately after the end of the Battle. Additional perks are awarded if Godzilla conquers a number of cities.
Planet X is made available after completing all four tasks, even if it took them multiple cities to do so. If Planet X is chosen, the player will not be able to score any perks from associated cities or play any remaining Kaiju Battles. You cannot return to Earth once you travel to Planet X.
- Tokyo - +1% Annihilation Bonus
- New York - +2M Saucer Attack
- Paris - +500K Loops
- London - +4M Destruction Jackpot
- 1 City - 5M & +3 Godzilla Powerups
- 2 Cities - 10M & Extra Ball
- 3 Cities - 20M & quicker Heat Ray cooldown timer
- 4 Cities - 40M & +15M Destruction Jackpot
Multiballs:
These three multiball modes can only be played by themselves, but can stack with Kaiju Battles if they are started before the multiball; other side modes will also run as usual during either multiball mode.
Godzilla Multiball:
Damage the building and decrease the building integrity to 0% to light Godzilla Multiball. Upper / middle floors can be destroyed by shooting the ramps or the building, while lower floors can only be destroyed by shooting the building itself. Once the building integrity has reached 0%, shoot the building to start Godzilla Multiball. (On the Premium / LE, shoot the building three times after reaching 0% to lock balls, with the third lock starting Godzilla Multiball.)
Hold the action button at the very start of Godzilla Multiball (during the initial buildup) to change the background music. This defaults to Blue Oyster Cult’s “Godzilla” but there are seven tracks that can be played.
Godzilla Multiball begins by either plunging and releasing all three balls from the magnet lock (Pro) or releasing all three balls from the building towards the flippers (Prem / LE). During Multiball, shoot lit shots for Jackpots worth 500k + 500k per Godzilla Multiball started. Each jackpot advances its corresponding shot to the next Jackpot level, up to three times per shot until the Super Jackpot is scored:
- Blue > 1x Jackpot
- Green > 2x Jackpot
- Yellow > 3x Jackpot
- Orange > 4x Jackpot
- Red > 5x Jackpot
Super Jackpot, worth the jackpot total, lights at the building by shooting 6 Jackpot shots. Complete all lit shots for +1x to Super Jackpot. Shoot the Wallop shot (reverse building) for an additional +1x. Scoring the Super Jackpot also relights all jackpots at +1x their initial level (the highest level jackpots can be lit at after scoring the Super Jackpot is 3x), and is required to qualify Monster Zero.
Balls can be added to this 3-ball multiball by shooting any three green Neo-Barrier standups, followed by a right spinner shot.
Mechagodzilla Multiball:
Shoot the right spinner enough times (20 + 10 per activation) to bring Mechagodzilla online, then shoot the spinner once more to deploy him. Once Mechagodzilla has been deployed, the jump ramp will rotate to the target bank side on the Prem / LE. Disable the Neo Barrier by shooting all three targets (or on the Pro, the two standup targets and the right spinner). Then, shoot the right spinner once more (or use the jump ramp on the Prem / LE) to start Mechagodzilla Multiball.
During Multiball, the ramps and building are lit to score jackpots worth 1M + 500K per Mechagodzilla Multiball started. After collecting a jackpot, shoot the target bank to score another jackpot and re-light the jackpots that weren’t collected - third and fourth jackpots are 2x, fifth and sixth jackpots are 3x.
Collect all three jackpots at the lit shots and the target bank for a timed super jackpot - build up the super jackpot value by 500K points per spinner hit for 20 seconds, then collect it at the Tail Whip / right spinner lane within 20 seconds; 3x at the Tail Whip lane (+3 Godzilla Power-Up), 1x at the right spinner lane (+2 Godzilla Power-Up). Draining to a single ball while the super jackpot is lit will give the player a 10 second timer to collect it. Scoring a Super Jackpot during this multiball is necessary to qualify Terror of Mechagodzilla.
Saucer Attack Multiball:
This Multiball is qualified by defeating 6 saucers through the Saucer Attack feature. Once it has been qualified, the next shot to the flashing pop bumper during normal play will cause the flippers to die and the ball to drain as multiball begins. Saucer Attack Multiball can only be played once per game.
The goal of Saucer Attack Multiball is to lock on to and destroy saucers. Three white flashing inserts are lit to score jackpots starting at 2.5M + 1M per Saucer Jackpot collected - only 2 need to be made at first, but each Saucer Jackpot requires 1 more shot. Complete them all to light the Maser Cannon target to lock onto a saucer for 2x the jackpot value, then shoot the bumper within 15 seconds to score a Saucer Jackpot worth 10x the jackpot value +1x per Saucer Jackpot collected. Every Saucer Jackpot adds a ball, so this multiball can last quite a while.
Other Scoring:
Allies:
Godzilla has three allies, each with associated perks, that can be collected at the scoop when lit. Allies are primarily lit by making it halfway through Kaiju Battles, but can also be lit through:
- Scoring a Super Secret Skill Shot (also collects it)
- Destroying 5, 21, 33, 45, etc. fighters during Jet Fighter Attack
- Imposter Battle #1
- Making 6 consecutive loops
- Making three shots in the Rage Combo sequence (+1 shot per Ally lit this way)
- Super Train Loops Train Jackpot (Prem / LE only)
- Godzilla Power-Up #9 (lights all of them!)
- Mystery Award
Pressing the right flipper when an Ally is lit cycles between any of the unlit ones, so set up a shot to the scoop by holding the ball on the left flipper, and use the right flipper to choose the ally you want. These can be collected at any time, and multiple allies can be collected in a single shot if more than one is lit. Each collected ally also lights the left spinner to advance towards Monster Rampage.
- Rodan - 2x Playfield for 60 seconds (75 seconds via Godzilla Powerup #6).
- Mothra - Lights left outlane for Mothra Save. If the ball saver is already active, Mothra Save won’t be qualified until it expires.
- Anguirus - Action button adds a ball during any Multiball. Collected Anguirus activations stack over the course of the game.
Saucer Attack:
Saucers control the monsters that the Xiliens brought back to life. Shooting the saucer bumper at the far right of the playfield enough times (5 + 3 per saucer destroyed), or rolling over the switch directly below it, lights the bumper for Saucer Attack for 10 seconds (-2 per subsequent saucer).
Saucer Attack scores a minimum of 2M + 20,000 points per bumper, increasing by 75% for each saucer destroyed. The value for Saucer Attack is multiplied by +1x every time one is collected on a ball, and is further doubled if the player shoots the bumper by making an alley pass through the right return lane; this will also count as 2 Saucers destroyed. Conquering New York will add an additional 2M to the Saucer Attack value.
Awards are given after destroying certain amounts of saucers:
- 3 Saucers: Extra Ball
- 6 Saucers: Light Saucer Attack Multiball
- 9 Saucers: +3 Godzilla Power-Up
- 12, 20, 30, 40, etc. Saucers: +1x and Lights Destruction Jackpot
Jet Fighter Attack:
Start Jet Fighter Attack by collecting 6 missiles at the flashing inlanes. On subsequent attempts, the inlanes must be lit by shooting the right spinner lane, and only one inlane might be lit at a time (which toggles via slingshot hits).
Shoot roving red arrows to collect hurry-up values starting at 1M, add 1M to the value of the next hurry-up value at a higher level, temporarily pause the timer, and destroy jets. The value for each jet destroyed increases by 500K per Jet Fighter Attack started. If 5 shots are made during a single attempt at the mode, the left spinner will light for a final hurry-up starting at 5x the normal hurry-up value and destroying 1 more jet. Rolling through either inlane during this mode resets the hurry-up timer.
Destroyed jet fighters also count up and score various awards during the course of the game:
- 5 Jets: Light Ally
- 10 Jets: Extra Ball
- 15 Jets: +1x Destruction Jackpot
- 21, 33, 45, etc. Jets: Light Ally
- 27, 39, 51, etc. Jets: +1 Godzilla Power-Up
Magna-Grab & Imposter Battle:
Completing all 3 Powerline stand-up targets lights the right inlane. Passing through a lit right inlane will light the Magna-Grab to score points and capture the ball. Release a ball from the Magna-Grab by pressing both flippers at the right time; every loop shot following a Magna-Grab will be worth 5x its normal value.
Alternatively, time the release of the ball so that it enters the left spinner, and one of a series of Imposter Battle awards will be scored in the following order:
- 15M & Light Ally
- 20M & +1% Annihilation Bonus
- 30M & +1x Destruction Jackpot
- 250M (!)
Imposter Battle can also be scored by quickly shooting the left spinner after the ball releases from the Magna-Grab.
One of the awards from Godzilla Power-Up #5 instantly collects the next Imposter Battle award.
Rage Combo:
Every time the Heat Ray reaches level 3 charge, the left inlane will light. Rolling over the lit left inlane will light the right ramp to start the Rage Combo sequence. The following 5 shots must be made in succession: right ramp, left ramp, center spinner, upper loop, tail whip. Each shot awards 3M (+1M per activation) x the number of the shot. Making the center spinner shot will light an Ally, and making the final tail whip shot will score a 20M bonus, increase the Destruction Jackpot multiplier, and light the building to collect it.
After collecting the first Ally, the 4th shot in the sequence, then the 5th shot in the sequence, must be made to light future Allies in subsequent Rage Combos. Only 3 Allies can be collected from Rage Combo per game.
Monster Rampage:
Complete R-A-M-P-A-G-E to start Monster Rampage. At the start of the game, the first two letters are spotted, so only five need to be collected to start it the first time. Letters can be collected at the left spinner when “Adv. Rampage” is lit through any of the following:
- Changing Cities through City Select
- Collecting a Destruction Jackpot or increasing its multiplier through any method
- Collecting an Ally (first RAMPAGE completion only)
- Mystery Award
This single-ball mode starts with a generous unlimited ball-save. During the mode, shoot the single lit shot repeatedly for points, with each successful shot increasing the value for the next shot. The jackpot value starts at 3 million and increases by 1.25 million for each jackpot collected, regardless of which physical shot is lit. The lit shot is timed (15 seconds) to move from: Left Ramp → Building → Center Spinner → Right Ramp → Loop → Tail Whip → Left Spinner → mode ends. The values for each shot can be multiplied by both Rodan and from the Rampage X gained after making enough shots during the mode.
Making cumulative shots during the mode scores the following:
- 12 shots - Extra Ball & +1x to all shots made during Monster Rampage
- 28, 44, 60, etc. shots - +2x Destruction Jackpot & +1x to all shots made during Monster Rampage
Heat Ray & Super Spinner:
Qualify the Heat Ray by spinning the center spinner enough times - 60 for the first, 120 for the second, etc. Once the action button is flashing, hold the action button to “charge” the Heat Ray to collect all lit shots. As soon as the meter on the display reaches 100%, it’s safe to release the button. The more times you use the Heat Ray, the longer you will need to hold the action button to use it (though this can be sped up by conquering three Cities).
(Note that the Heat Ray cannot be used on Destruction Jackpots, can only be used once during Tier 2 Kaiju Battles and multiball modes, and is disabled during Planet X Multiball).
After using the Heat Ray, the next spinner shot will score Super Spinner points - 2x per spin +1x for every city Godzilla has conquered - for one spinner rip only, with no cap. +2x can also be added from Godzilla Power-Up #7.
Godzilla Powerups:
Completing objectives will add arrows to the Godzilla Power-Up meter, which can be cashed out for awards at the scoop and add 300,000 points to end-of-ball bonus. They can be obtained in the following ways:
| Task | Power-Up Arrows Rewarded |
|---|---|
| Make a Super Secret Skill Shot | +2 |
| Win a Tier 1 battle on your first try | +2 |
| Win a Tier 1 battle on a repeat attempt | +1 |
| Super Jackpot during Godzilla & Jet Jaguar VS. Megalon & Gigan | +1 |
| Conquer your first city | +2 |
| Start Powerline Attack | +1 |
| Win Tesla Strike | +2 |
| Start Bridge Attack Multiball | +1 |
| Start Tank Attack Multiball | +1 |
| Score a Destruction Jackpot | +1 |
| Enter a new city | +1 |
| Start Godzilla Multiball | +1 |
| Start Mechagodzilla Multiball | +1 |
| Super Jackpot during Mechagodzilla Multiball | +2 |
| 3x Super Jackpot at tail whip during Mechagodzilla Multiball | +3 |
| Start Saucer Attack Multiball | +2 |
| Score 9 Saucer Attacks | +3 |
| Start Jet Fighter Attack | +1 |
| Make the final shot during Jet Fighter Attack | +1 |
| Destroy 27, 39, 51, etc. Jet Fighters | +1 |
| Start Monster Rampage | +2 |
| Score a Super Spinner award | +1 |
| Make 3 consecutive loops | +1 |
| Make 10 consecutive loops | +3 |
| 3, 7, 20, 33, etc. Tail Whips | +2 |
| 3, 20, 30, 40, etc. Trains | +2 |
| Random mystery award | +1 |
| Score a City Combo | +1 |
| Score 5 Secret Combos | +2 |
| Win Planet X Multiball | +6 |
Power-Ups are awarded in the same order every game. The first Power-Up set is randomly determined from the five options listed (and remains the same across players in a multiplayer game), but will always be +250k Godzilla Multiball Jackpot or +500k Mechagodzilla Multiball Jackpot in competition mode.
Level 4 and beyond of Godzilla Power-Up can only be collected by scoring a Super Jackpot during Mechagodzilla Multiball or Godzilla Multiball. You can collect any other powerups you’ve qualified before actually playing Terror of Mechagodzilla or Monster Zero, which takes the place of Powerup #4.
| Powerup Number | Powerup Arrows Required | Left Flipper | Right Flipper |
|---|---|---|---|
| #1 | 2 | Godzilla Multiball Jackpot +250k or Light Heat Ray or 15M or Destroy Saucer or Saucer Attack +3 secs. or Jet Fighter Attack Values +250k | Mechagodzilla Multiball Jackpot +500k or +1x Skill Shot Multiplier or Loops +250k or Monster Rampage - Spot Letter or Saucer Attack +500k or Collect 3x Bonus |
| #2 | 3 | Tier 1 Battle Timers +20 secs. | Tier 1 Battle Time Bonus 5x |
| #3 | 4 | Destruction Jackpot +3 secs. | Tier 2 Battle Timers +20 secs. |
| #4 | 6 | Light Monster Zero (if Godzilla MB Super Jackpot scored) | Light Terror of Mechagodzilla (if Mechagodzilla MB Super Jackpot scored) |
| #5 | 6 | Collect Imposter | Rage Combo +3 secs. |
| #6 | 6 | Rodan 2x Scoring +15 secs. | Magna-Grab 2x |
| #7 | 6 | Super Spinner +2x | Loops 2x |
| #8 | 6 | Whichever option wasn’t awarded from Godzilla Powerup #4 (if qualified) | Light King of the Monsters (if Planet X has been reached) |
| #9 | 6 | +2x Destruction Jackpot | Light All Allies |
| #10 | 6 | Collect 10x Bonus | Monster Rampage +1x |
| #11 | 6 | +3 Godzilla Powerups | Light King of the Monsters (if all three other wizard modes played) |
Godzilla Wallop:
If a mode is running, a strong shot to the exit of the building that passes through its entrance will award one lit shot, prioritizing those on the left side of the playfield. This is called the “Wallop shot” by the game. Further uses of Godzilla Wallop during the mode just award 1M. The first two times (in single-ball play) this will award a short ballsave.
Godzilla Wallop also lights Advance Train at the left ramp, even if a mode isn’t active or Wallop has already been used.
Loops:
Shoot the upper loop from the upper flipper to score 500K (+15K per loop), with consecutive loop shots adding +1x to the loop value for only that consecutive sequence - to a max of 10x. The base loop value maxes out at 2M, and loop scoring is multiplied by 5x after releasing a ball from the lit Magna-Grab captive ball.
Reaching consecutive loop shot thresholds awards certain perks the first time they are reached during a game:
- 3 consecutive loops: +1 Godzilla Power-Up
- 6 consecutive loops: Light Ally
- 10 consecutive loops: +3 Godzilla Power-Up
Awards are also given after scoring enough loops during the course of an entire game:
- 25, 40, 80, 120, etc. loops: +1x to and lights Destruction Jackpot
Each loop adds 100,000 points to end-of-ball bonus.
Tail Whips:
Score Magna-Grab when lit to light the tail whip shot for Tail Whip. Shooting the loop followed by the tail whip awards a “Super Tail Whip” worth 2M x the number of loop shots made before the tail whip, and collects 2 Tail Whips.
Tail Whips count up and score awards during the game:
- 3 Tail Whips: +2 Godzilla Power-Up
- 7, 20, 33, 46, etc. Tail Whips: +2 Godzilla Power-Up and lights Destruction Jackpot
Trains:
Light Advance Train at the left ramp by shooting:
- Scoop
- Reverse building
- Captive ball when “Attack Bridge” is lit
Shoot the left ramp when “Advance Train” is lit to collect 1 train for 2 million points + 200K per train. Collecting Trains will also score awards.
Awards:
- 3 trains: +2 Godzilla Power-Up
- 5 trains (Pro): Big Points (50M)
- 5 trains (Prem / LE): Super Train Loops
- 10 trains: +1x and Lights Destruction Jackpot
- 15, 25, 35, etc. trains: Big Points (50M)
- 20, 30, 40, etc. trains: +2 Godzilla Power-Up
Super Train Loops: (Prem/LE only)
This timed mini-mode starts at the 5th train collected and takes priority over all other modes. Repeatedly “loop” shots to a single ramp to score big points, with each shot made without hitting any other switches adding multipliers to the value. Shooting the building ends the mode prematurely.
- The building is set to the one-story lower height to facilitate looping either ramp.
- Successful shots add a couple seconds of time.
- After 5 consecutive Right Ramps, the building will divert the ball to the other flipper.
- After 5 consecutive shots to the Left Ramp, the Bridge open and divert the ball.
- After 4 consecutive Right Ramps, a bonus will be lit at the Left Ramp worth the total value collected so far. This also lights an Ally.
Mystery Award:
Collect mystery awards at the Maser Cannon standup target when flashing. Qualify the target by either rolling over the switch directly right of the pop bumper - and / or hitting the standup target itself - 3 times + 1 per collection.
Awards:
- 5M
- +1 Bonus X
- +1 Tail Whip
- Advance Fighter
- Advance Train
- Light Adv. RAMPAGE
- Destroy Saucer
- Light Ally
- Light Destruction Jackpot
- Light Inlanes
- Light Kaiju Battle
- Spot Powerline
- Spot Bridge Attack
- Spot Tank
- Start Mechagodzilla Battle (activates the Neo Barrier, only available once per game)
- Start Hedorah (see below)
City Combos:
Each of the 4 Cities has a set of unique combos, 3 combos on the Premium / LE and 2 on the Pro (note that Prem / LE exclusive combos require the building to be in Lock position). After completing 5 City Combos, an extra ball will be awarded. City Combos that have not been collected yet can be viewed in the status report. City Combos score 5M, with a bonus of 10M for completing each city’s set.
| Combo | 1st Shot | 2nd Shot | 3rd Shot |
|---|---|---|---|
| Tokyo Combo 1 | Center Spinner | Big Loop | Mecha Side Lane |
| Tokyo Combo 2 | Right Ramp | Through Building | Big Loop |
| Tokyo Combo 3 (Prem / LE) | Center Spinner | Pop Bumper | |
| New York Combo 1 | Left Ramp | Center Spinner | Mecha Side Lane |
| New York Combo 2 | Right Ramp | Left Ramp | Pop Bumper |
| New York Combo 3 (Prem / LE) | Right Ramp | Center Spinner | Mecha Side Lane |
| London Combo 1 | Right Ramp | Left Ramp | Scoop |
| London Combo 2 | Right Ramp | Through Building | Any Shield Target |
| London Combo 3 (Prem / LE) | Left Ramp | Captive Ball | |
| Paris Combo 1 | Left Ramp | Right Ramp | Left Spinner |
| Paris Combo 2 | Left Ramp | Right Ramp | Through Building |
| Paris Combo 3 (Prem / LE) | Left Ramp | Left Spinner |
Secret Combos:
There are 10 secret combos throughout the game. Each secret combo is worth 2,500,000. The secret combos are:
Spoilers
| # | 1st Shot | 2nd Shot | 3rd Shot |
|---|---|---|---|
| 1 | Center Spinner | Scoop | |
| 2 | Center Spinner | Mecha Bottom Rollover | |
| 3 | Maser Target | Scoop | |
| 4 | Under Flipper | Captive Ball | Mecha Side Lane |
| 5 | Reverse Mecha Side Lane | Skill Shot (left spinner) | |
| 6 | Maser Target | Pop Bumper | |
| 7 | Shield Targets | Building Hit | |
| 8 | Right Ramp | Maser Target | |
| 9 | Left Ramp | Pop Bumper | |
| 10 | Building Thru | Shield Targets |
Additionally, collecting certain numbers of secret combos awards different awards:
- 2 Secret Combos: Qualify Hedorah as the next mystery award
- 5 Secret Combos: +2 Godzilla Power-Ups
- 6 Secret Combos: Qualify Hedorah as the next mystery award
- 10 Secret Combos: No award, but counts as having completed the Planet X Victory Challenge
Hedorah:
Once this award has been collected, for the rest of the current ball, one of the shots will be lit in light green. Shooting this shot will collect and increase the Hedorah value, which starts at 750K and increases by 15K per switch, and light another shot to repeat the process. Score 100 switch hits to cause the green shot to flash, and shoot it to score Hedorah Jackpot for 3x the value. During a long ball, points from Hedorah can be very lucrative!
Oxygen Destroyer:
On the last ball of a game, the right outlane lights for Oxygen Destroyer. This is a one-time only ball save where in order to defuse the destroyer (and save your ball), a new ball is plunged, and then that ball must be shot all the way through the building within 12 seconds. This will also collect anything else that was lit at the building shot (but will not start Godzilla Multiball as of most recent code).
If time runs out, the flippers are killed and the ball drains; and if the ball drains during the countdown, there are no second chances - the Destroyer detonates as if time ran out.
Extra Balls:
Extra balls are instantly awarded once any of the below tasks have been achieved.
- Win 2 Kaiju Battles
- Destroy 3 Saucers
- Destroy 10 Jet Fighters
- Make 12 shots during Monster Rampage the first time
- Collect 5 City Combos
Bonus:
- Cities: 750K
- Tail Whips: 250K
- Godzilla Power-Ups: 200K
- Fighters Destroyed: 350K
- Loops: 150K
- Bonus X (earned through conquering Cities or as a Mystery Award)
Mini-Wizard Modes:
There are three smaller wizard modes in this game:
Monster Zero:
If the player scored the Super Jackpot during Godzilla Multiball, then chooses “Light Monster Zero” from Godzilla Power-Up Level 4 or 8, the next building shot will begin Monster Zero. To defeat Monster Zero, the player must successfully lock up to 3 balls in single-ball play, then take them on in a Multiball showdown. The mode starts with a 30 second ball saver, reduced to 10 seconds after each lock.
- Lighting Locks - In order to qualify a lock, shots must be made to any shot with a green arrow; two shots are required for the first lock, then three, then four. Collecting enough of these shots lights the lock at the building and activates red inserts at all major shots for 30 seconds; making these shots adds points to the jackpot value, while successfully locking each ball advances the Super Jackpot multiplier to 3x, 5x, and finally 8x.
- Victory Multiball - Once the player has locked at least 1 ball at the building and drained, or locked all 3 balls, Victory Multiball will begin, where 3 shots at a time are lit to score the built jackpot value. Jackpots are 1x if there are two balls in play, 2x if there are three balls in play, and 4x if there are four or more. Collecting 10 jackpots lights the reverse building shot for the Super Jackpot, the first of which adds a ball into play. The mode ends once the player drains down to a single ball.
- If you drain before locking the first ball, the mode ends and unfortunately does count as a “ball-ending” drain (with some sass from the Xiliens to boot…).
Terror of Mechagodzilla:
If the player scored the Super Jackpot during Mechagodzilla Multiball, then chooses “Light Terror of Mechagodzilla” from Godzilla Power-Up Level 4 or 8, the next building shot will begin Terror of Mechagodzilla. This is a unique, flip count-based multiball where the goal is to lock in values for the targets, ramps, and spinners during each phase, then cash them out.
Completing the goal in each of the first three phases will add flips and reset the goal. The goal can be completed a second and third time to add a diminishing number of flips again. Once the player runs out of flips per phase, they will move onto the next phase. The mode ends when they run out of flips at the end of the 4th phase.
- 1st phase - 30 flips. Single-ball. The standup targets are lit to score points and increase their value - the three powerline targets, the three shield targets, and the Maser Cannon. Hitting a target refunds one flip. Complete them all to add 30 flips. Drains subtract 6 flips.
- 2nd phase - 45 flips. 2-ball multiball. Shoot spinners to score points and increase their value. The left spinner sets the cap of the value for the center and right spinners. Collect 100 spins to add 45 flips. Drains subtract 5 flips.
- 3rd phase - 50 flips. 3-ball multiball. Shoot ramps to score points and increase their value. Shoot 8 ramps to add 50 flips. Drains subtract 4 flips. Both ramps are lit for the first round; after reaching the goal, the ramps will alternate.
- 4th phase - 100 flips, and no way to add more. 4-ball multiball. All shots are lit at the values that were locked in during each phase, and the bumper & captive ball are lit for 3M. Drains subtract 3 flips. At the end, the flippers are disabled, all balls are drained, and a new ball is served.
Planet X Multiball:
Planet X is qualified as a City Select option by achieving these tasks, even across multiple cities:
- Starting a Kaiju Battle
- Starting Tesla Strike
- Starting Bridge Attack Multiball
- Starting Tank Attack Multiball
Choosing to head to Planet X when qualified will award the Earth Bonus, awarding 25% of the total Carnage Bonus awarded from each City x the number of Cities visited (up to 4x). The mini-wizard mode, Planet X Multiball, will then start. This is a 3-ball multiball with balls added at each major phase; it can also be played as a single-ball mode, but will end if the ball drains.
Defeat the Xiliens once and for all by making the following sets of shots in order:
- 3 blue Powerline targets, then center spinner for 10M
- All green Tank shots, then Maser Cannon for 15M
- 5 orange Magna-Grab shots, then right ramp for 20M
- All yellow major shots
- Scoop within 20 seconds for the final hurry-up
The last shot of the first three sets are multiplied by up to 5x - +1x for each city that Godzilla was able to conquer. The scoop shot is a timed shot that must be made within 20 seconds to win; it is a hurry-up that starts at 50% of the Earth Bonus (minimum of 175M) value before decreasing over time.
After the final scoop shot, +6 Godzilla Power-Up will be awarded and the 140-second timed Planet X Victory Challenge will start, allowing you to play through all four waves again for double the Super Jackpot values. The final shot value during the Victory Challenge is double the hurry-up value from the first phase of Planet X. Unlike the regular Planet X multiball, the Victory Challenge does not continue in single-ball play. Winning the Victory Challenge is very difficult but one of two tasks required for the final Monster Island Madness mode. If you fail the Victory Challenge but want to reach MIM, you can make up for this requirement by collecting all ten secret combos.
Once the player reaches Planet X and triumphs over the Xiliens, returning to single ball play, the Power, Bridge, and Tank objectives will be qualified once more. Completing all three objectives lights the scoop for a Planet X Bonus worth 19% of the total score from the mode.
The Heat Ray is disabled during Planet X Multiball.
King of the Monsters (Final Wizard Mode):
Once either one or both of the above mini-wizard modes have been played, and Godzilla Power-Up #8 or #11 has been collected, King of the Monsters can be started by shooting the building. With the Xiliens defeated, Godzilla must take on all of the monsters he defeated once more to regain his dominance as King.
- Part 1: Battle all the Tier 1 monsters at the same time! The player has 60 seconds + 5 seconds per conquered city to defeat all four monsters, with shots for all four monsters constantly lit. Every monster successfully defeated adds time and +1x multiplier to the bounty that can be collected during part 2, which increases by the value of each successful shot during the mode (these follow the same rules as normal scoring, minus the time bonuses). Once either all four monsters have been defeated, time runs out, or the player drains, the next phase will start.
-
Part 2: 4-ball multiball with the bounty you built up during Part 1 at stake & Mothra and Anguirus active; King Ghidorah strikes back in full force! Your goal is to make shots to every shot with a flashing insert to light them all solidly, requiring multiple hits to all areas of the playfield. Once every light is lit, only then will the scoop light to collect the final bounty, multiplied by the number of balls the player kept in play (up to 4x!):
- Left spinner - 3 shots
- Left ramp - 3 shots
- Building - 5 shots
- Center spinner - 7 shots
- Right ramp - 2 shots
- Big loop - 2 shots
If Anguirus hasn’t yet been used when the player drains down to single-ball play, it will automatically be qualified for one last chance at a 2x bounty!
Once the player collects the Ghidorah Bounty, the game ends, with one last end-of-ball bonus.
Monster Island Madness (Ultra Wizard Mode):
If the player was able to successfully win the Planet X Victory Challenge (or make all 10 secret combos) and then successfully defeat King Ghidorah during King of the Monsters, one final wizard mode awaits the best players…
This is a timed, 75-second 6-ball multiball with unlimited ball save. The switch value starts at 25,000, increased by 2,500 for every switch hit. 7 yellow arrows are lit, starting at 10M, increasing by 5M for each one shot. Completing all arrows lights them red for double scoring for the remainder of the mode; completing the arrows again simply re-lights them all again. After time runs out, all balls are drained, and then your game also ends.

